Isolation Easter Dinner for 1!

2D286AAB-36C4-454A-8C79-0E77BE1870A7.JPG

Earlier this week I posted on Instagram about my plans for my Easter dinner for 1. Here is my rough schedule of activities and how I think through a dinner with multiple components aka how to prep it all!

Day before prep:

  • Roast beets

  • Make vinaigrette/marinade for beets

  • Make pea condiment

Other things you could do the day before if you have the fridge space:

  • Slice potatoes for scalloped potatoes and store them in the fridge covered in water

  • Make pie crust dough and store in the fridge

Roast beets:

  • Preheat oven to 425

  • Wash beets and dry

  • Trim off any odd bits or the ends if they look extra dirty

  • Wrap each beet in tin foil with a little olive oil

  • Place on a cookie sheet and roast under a cake tester inserts easily (time depends on the size of the beets - for small it could be 20-30 mins, for larger beets it could take an hour)

  • Allow to cool completely before peeling

Pea condiment:

Inspired by this article: Bon Appetit Basically: Pea Pesto

  • Steam 2 cups of frozen peas until bright green and tender, remove from heat and cool

  • Place in a food processor with 2 garlic cloves, zest of 1 lemon, 3 tsp of apple cider vinegar, 2 tbsp olive oil, ½ tsp red pepper flakes, salt and pepper, and process on high until smooth. If you have any soft herbs like mint or parsley they would go great in here.

  • Taste and adjust

  • Store in a container in the fridge

Beet salad vinaigrette/marinade:

  • ⅓ cup apple cider vinegar

  • 1.5 tbsp honey

  • ¼ cup olive oil

  • Salt and pepper

  • Shake in a mason jar until emulsified!

Once the beets are cool, peel and slice into ¾ cm slices. Put into a container and pour over half of the vinaigrette to store overnight so that the beets marinate. Store the remaining vinaigrette in the fridge.


Day of:

Morning:

  • Prep white buns (I am going to halve this recipe: Fraiche Living Perfect White Buns

  • Make pie (I am going to make a variation of this: Bon Appetit Lemon Meringue Pie, but will use different citrus fruits because I don’t have enough lemon. I’ll freeze the second pie crust for future use)

Afternoon:

Prepare and cook the lamb (I always start with the meat first to ensure there’s time for it to cook, and it can always rest while everything else cooks):

Lamb prep: take lamb out of fridge, season generously with salt and pepper and let it sit at room temperature for about 1 hour so it loses its chill

  • Make crust for lamb

  • Assemble lamb:

    • I’m then going to rub dijon mustard over the lamb to give something for the crust to stick to. I will then apply the crust, drizzle some olive oil over it and roast it at 325 until I reach 140F internal temp for medium lamb. From my research it looks like it will take 1.5 hours or so for my 3lb lamb

    • Will let it rest at room temp before slicing

Scalloped Potato prep:

  • While the lamb is roasting I’ll prep the scalloped potatoes. I am choosing to not make mine with cheese because I don’t think it will go with the lamb. I’m just going to do a simple milk, onion, butter combo. On the stove I’ll heat 2 cups of milk with 2 tbsp of butter, a bay leaf and some thyme. Heat on low, being careful to not scorch or curdle the milk. Season well with salt and pepper.

  • Meanwhile I’ll slice my potatoes thinly, along with 1 white onion. I just have 2 potatoes. I’ll layer the potatoes and onions in a baking dish and pour over the milk mixture.

  • Once the lamb is out of the oven, I’ll bake the scallop potatoes (covered) at 325F until fork tender (30-45 mins). I’ll take the tinfoil off for the last few mins and turn it onto broil to get a little colour on top. 

Roasted veg prep:

  • While the scalloped potatoes are in, I’ll prep the roasted veg. I have cabbage, some brussel sprouts, turnip and swiss chard stems. I’ll chop everything up and spread it evenly onto a lined baking sheet. I will then drizzle olive oil and mix the veg with 2 tbsp of grainy mustard so everything is evenly coated. Season with salt and pepper. Roast at 400 until everything is tender and starting to deepen in colour. Once the veg is out of the oven I’ll drizzle some honey and add a squeeze of lemon juice.

Bake white buns - always leave these for last so they’re fresh out of the oven! When they come out of the oven you can add everything back in the oven to reheat.


Assemble salad:

  • Layer the beets on the bottom of the plate

  • Add orange segments

  • Crumble goat cheese

  • Sprinkle on some toasted nuts (pecans, walnuts, almonds, whatever you have)

  • Top with greens if you have any, tossed in the remaining vinaigrette (arugula, mixed greens, pea shoots work!)

EDIT: It all worked out! Pictures added!

Nanny's Banana Bread

272C13B3-3F3E-42F1-870A-3B1B04D6B943.JPG

There are a million banana bread recipes on the internet. It’s hard to know which one to follow; which one will give the best result? All I can say is, in my eyes, this is the best banana bread out there because… it’s my Nanny’s recipe. This is the banana bread I ate my whole childhood - dark in colour and rich in flavour. I’ve tweaked it slightly to reduce the sugar and use whole grain flour (optional). But otherwise, it’s pretty much exactly how my darling grandmother made it.

EC291FC6-FD06-4F05-9352-3B3D25CDA082.JPG

Nanny’s Banana Bread

NOTE: This bread will keep on the counter for 2-3 days if you top with a banana slice like pictured. Without the banana on top, 4-5 days. It also freezes very well - recommend slicing and putting parchment paper between each slice. Reheat individual slices at 350F until toasty!

ingredients

4 small or 3 large bananas, very ripe and browned (+ one additional for topping if you’d like)

½ cup unsalted butter, melted

½ cup white sugar

2 eggs

1 cup all-purpose flour

¾ cup whole grain flour (or you can do all AP if you do not have WG)

1 tsp baking soda

1 tsp baking powder

¾ tsp kosher salt

method:

  1. Preheat oven to 350F. Prepare a loaf pan by greasing with butter or cooking spray and lining with a parchment paper “hammock” (parchment paper covers bottom and sides length wise).

  2. In a large bowl, mash your ripened bananas. Add in melted butter, sugar and eggs, mixing until well combined.

  3. In a medium bowl, whisk together dry ingredients.

  4. Pour dry ingredients into the wet ingredient bowl and fold in, being careful to not overmix. No flour should be visible, but clumps are ok!

  5. Pour into your prepared loaf pan. If you have an extra banana, slice in half lengthwise and place on top of the batter.

  6. Bake for 60-75 mins, until deeply browned and a cake tester comes out clean. Allow to cool completely before slicing.

Isolation Recipes and Thoughts

Keeping a running list here of recipes I’ve been making in isolation and how I’m thinking about the ingredients I have on hand! 

Sweets:

I have a limited amount of butter, no milk, and 1 dozen eggs so I’ve been thinking a lot about which baked goods to put all my eggs in (LITERALLY). Here are my choices to date. 

  • I made these Tahini Billionaire Bars from Bon Appetit last night. If you don’t have tahini you could swap in a different nut butter in its place. Honestly, the crust alone is worth it. I cut them up into smaller squares and wrapped them in packets of four for my freezer (parchment paper, then tin foil). TBD on how my freezer approach goes but a whole batch is too much for one person.

    • Saved my 2 egg whites leftover from this recipe. Will likely use as a binder for granola later this week.

  • Working on typing up my Nanny’s Banana Bread recipe, will post here later this week! I sliced up the bread and froze the slices individually so that I can heat it up in the oven whenever I want a toasty banana bread treat! Top with butter and flaky sea salt

Lunches:

  • Tuna melts have been getting me through. I recommend going beyond mayo and cheese and try different flavours: lots of lemon juice, capers, diced crunchy vegetables (red pepper, snap peas, carrots), pickles, grainy mustard, dijon mustard, sun-dried tomato - the world is your oyster/tuna!

  • I haven’t embarked on this yet but before isolation, I did buy 4 sweet potatoes in anticipation this day would come. Once I work through my fresh produce I think I’ll start making loaded sweet potatoes for lunches. One of my fav inspos is The First Mess Sweet Potato Fries with Miso Gravy - sometimes I do this as a topped sweet potato rather than fries. 

    • Other things I’ve been thinking about with my sweet potatoes: pierogis and gnocchi. TBD if I act on any of these thoughts.

Snacks:

  • I’ve been making Molly Yeh’s Scallion Pancakes ever since her cookbook came out a few years ago. I saw that Bon Appetit posted a recipe this week but their dough requires a 1 hour rest, whereas Molly’s only requires 20 mins. If you don’t have sesame oil you can always use a neutral oil like vegetable or canola. I do hoisin and sriracha as a dipping sauce.

  • ORANGES - I am very grateful for Fresh City Farms, who is keeping me out of the grocery stores and safe in my apartment. It is a beautiful thing that it is citrus season right now. Check with your local farmer’s markets and CSA baskets - many are still delivering.

Dinners:

Not much to add here because I had a Goodfood Delivery this week to work through. BUT here are recipes I have planned out for next week:

  • THE STEW: this is my favourite pantry meal any time of the year and quarantine is no exception. It’s so simple, so flavourful, and so easy. 

    • Side note: I predict as I update this list it will become 50% Alison Roman recipes.

  • I have some broccoli and leeks (and weirdly a container of heavy cream) in my fridge that need to be used up, so I’m thinking about making this Alison Roman Spicy Baked Pasta next week. 

    • Side note: AR count to 2. 

  • I also have a cabbage that I’ve been using a FaceTime phone prop this last week. Might make these Stuffed Cabbage Leaves to use that up. But also thinking of holding onto my cabbage since it lasts for a long time. I’ll report back.


I haven’t had to tap into my freezer or lentil/bean reserves much yet, but I have many thoughts to share when I do! Stay safe and stay healthy - xoxo Kaleigh

Tangy Tomato Chutney

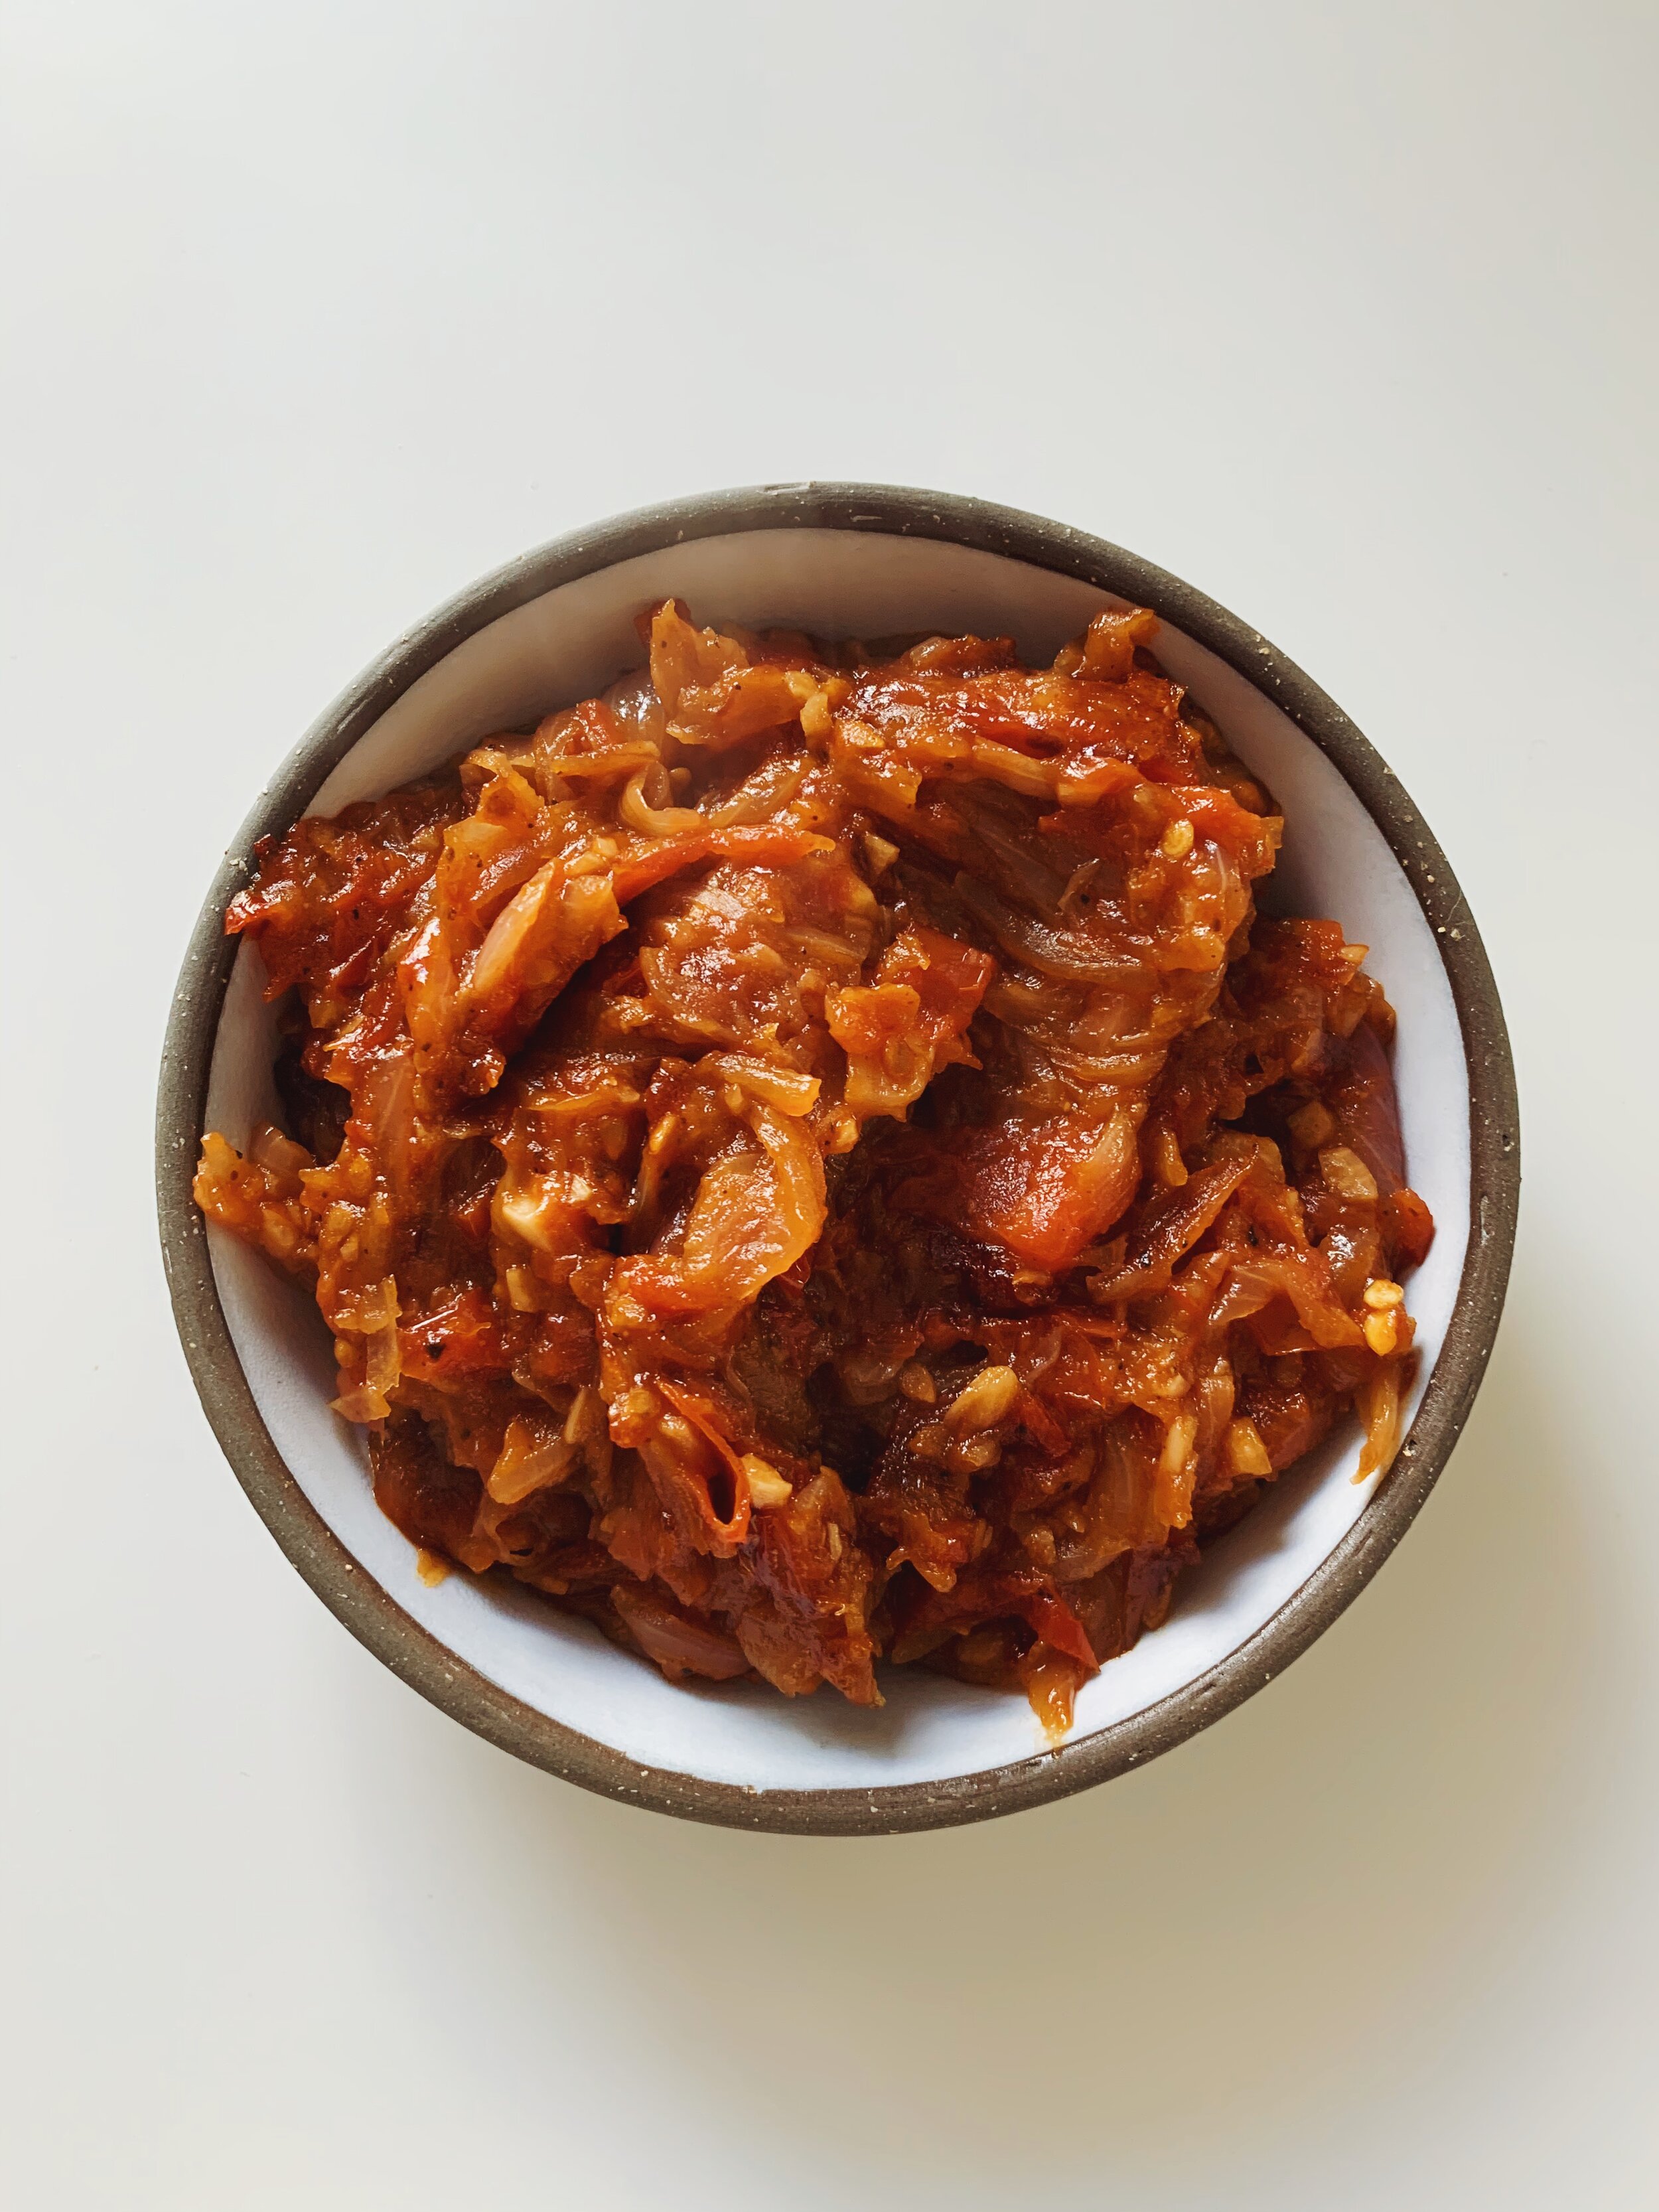
4997175C-8B7F-440A-BF87-D88309DEA62E.JPG

Brunch has become a staple for me on weekends since moving to Toronto. Most of the time I elect to make brunch at home, but when I go out, my place of choice is The Corner Place down by the St. Lawerence Market. With a strong aversion to waiting in lines, my friend and I have made a bit of a ritual out of going to this hidden gem and enjoying their menu that highlights fresh ingredients from the market across the street. Their St. Lawerence Benny is my regular order; featuring a tangy, sweet and savoury tomato chutney, smoked cheddar and creamy hollandaise.

This recipe is my attempt at recreating the flavours of my brunch-out favourite. Highly recommend serving on English muffins, with some nice old cheddar, bacon and soft poached eggs. This would also make a great condiment on sandwiches or your next cheese board.

7A3AAA69-8315-4B72-8DAA-C8C59A6D6C7C 2.JPG

Tangy Tomato Chutney

40 minutes

If making for brunch, I get the chutney started before anything else. The longer you cook the chutney on a lower heat, the deeper the flavour will be. I get to step 2, and then I’ll initiate the other elements of my brunch (bacon, eggs, etc).

Ingredients

2 tbsp extra virgin olive oil

1 red onion, thinly sliced

2 large garlic cloves, minced (or 3-4 small ones)

2 large tomatoes (or 3-4 medium), diced (yields about 2 cups of diced tomato)

½ tsp - 1 tsp of red pepper flakes

2 tbsp red wine vinegar

2 tbsp maple syrup

Salt n pepper

Method

  1. In a medium saucepan, heat olive oil, red onion and minced garlic over medium-low heat. Continue to cook until onions are translucent and buttery, about 7 minutes. Season with salt and pepper.

  2. Add diced tomato to the saucepan, and continue to cook on medium until tomatoes break down and become stew-like, darkening in colour. This will take some time - about 20-25 minutes.

  3. Add red pepper flakes and vinegar, increasing the heat to medium-high to boil off the vinegar. Your eyes may sting a little during this step - vinegar can be strong! Takes 3-5 minutes.

  4. Finally, add in maple syrup and continue cooking for 1-2 minutes until the syrup is well integrated.

  5. Taste and adjust your seasoning with salt and pepper.

  6. Serve warm or room temperature, or put into the fridge for future use.

Lemon Garlic Roast Chicken

EE86F235-D748-4F97-B2B6-BF99F00A4413.JPG

Sundays back home typically involve a large family meal. Growing up my grandmother would come over and later in my life after my brother had moved out, he’d be back home for Sunday supper. There was usually a roast of some type but the ritual, more than anything, was our family coming together over a shared meal before the week began again. Since living in Toronto I’ve tried to keep this ritual alive. Sundays are typically a slower day for me, so even if it’s just roasting a chicken for myself, it feels nice to keep up the tradition. This is my go-to roast chicken recipe because it doesn’t require a ton of ingredients and the flavour is easily malleable for leftovers. Throughout the week I cut it up for salads, heat it up with chilli powder and lime for tacos, and glaze the drumsticks with honey and sriracha for weekday dinners with rice and steamed broccoli. 

Another Sunday tradition of mine is going to my local farmer's markets. I can’t recommend enough buying your chicken from the market or a local butcher. Although it will be more expensive than the grocery store, the quality of the meat is so much higher. Plus a roast chicken will give you so many servings (not to mention the soup potential!) that on a per-serving basis, it’s quite economical.


Lemon Garlic Roast Chicken

Time: 2 hours

NOTES:

The key to this recipe is to put most of the flavour UNDER the skin of the chicken. Don’t be afraid to get your hands a little messy! You can buy food-safe plastic gloves if you are uncomfortable touching raw meat.

You may also feel like this is a lot of salt. It is actually a modest suggestion for how much salt should really go on a bone-in whole chicken. The salt will ensure a moist, flavourful chicken with crispy skin.

Ingredients:

4-5lb whole chicken, ideally locally/organic

Rub:

  • Zest of 1 lemon

  • 1 - 1.5 tbsp kosher salt

  • 1 tbsp dried oregano

  • 4 cloves of garlic, finely minced

  • 2 tbsp extra virgin olive oil

  • Fresh cracked black pepper

Other:

  • 1 onion, peeled and cut into quarters

  • Zested lemon cut in half

Method:

  1. Preheat oven to 375F and ensure the rack is in the centre of the oven.

  2. In a small bowl combine the lemon zest, kosher salt, dried oregano, garlic, olive oil and pepper - stirring to create a coarse paste.

  3. Prepare a roasting pan or 9x13 pan - add onion quarters to the corners.

  4. Pat your chicken dry and place into the pan breast up. Using your pointer finger and your middle finger, lift the skin on each chicken breast away from the breast meat. 

  5. Take ⅓ of your paste and push under the skin on one chicken breast, trying to spread evenly under the skin. Repeat for the other breast.

  6. Rub the remaining ⅓ of your paste over the skin of the chicken, being sure to get the wings and drumsticks.

  7. Place one ½ the lemon inside the chicken, ensure it isn’t fully blocking the air from entering the chicken. Place the other ½ lemon in the pan.

  8. Cook for 20 mins per pound, between 1 hour and 20 mins and 1 hour and 40 mins depending on the size of the chicken. I recommend rotating the chicken halfway through as the back of your oven is hotter than the front.

  9. Chicken is done when a meat thermometer reads 165F in the thickest part of the thigh meat.

  10. Let your chicken rest for 15 minutes before serving.

  11. The juice at the bottom of the pan makes a delicious serving sauce. Put it into a mason jar in the fridge to separate the fat, skim off, and heat as a jus.