chocolate

Mom's Orange Chocolate Cookies

These cookies activate a very nostalgic part of my brain. My mom had two signature cookies growing up - her oatmeal chocolate chip cookies (which I will publish on here one day but I have not figured out her magic touch!) which were a regular occurrence, and then these orange chocolate cookies, which were a bit more of a rare find. She isn’t sure the origin of these cookies, it’s likely a recipe passed on to her from a friend. The aroma of the orange with the slight touch of clove brings back so many great memories for me. I love these for fall and winter with their slight touch of clove. Perfect with a cup of tea on a cool day!

A few tips for these cookies:


Cream together the butter and sugar until super fluffy

You want the mixture to look almost white before adding in the egg! 

Be patient once you add in the egg

You are forcing quite a bit of liquid into fat (the butter) so it takes time for it to whip together; patience at this stage will lead to wonderfully fluffy cookies. If you have a stand mixer this is pretty straightforward as it’s hands-off but you want to whip until all the liquid is incorporated into the butter and you have a homogenous, light, extremely fluffy mixture.

Don’t over mix once you add in the flour

To ensure you don’t end up with a “tough cookie”, mix until just combined for steps 5 and 6. You could always mix by hand at this stage if you feel like your mixer might lead to over mixing (I just use the lowest setting on my stand mixer).

Drop the cookies vs shaping them

These were originally called chocolate orange drops, because instead of shaping the dough you literally just scoop with a spoon and drop onto the sheet. This gives them an imperfect shape that leads to great texture - little scraggly bits get crispy while the inside of the cookie remains soft and fluffy.


Orange Chocolate Cookies

15 minute prep time, 12 minute bake time

Yield ~2 dozen cookies


Ingredients:

½ cup butter, room temperature

¾ cup brown sugar, well packed

1 egg

2 cups all-purpose flour (or you can do half whole wheat!)

1 tsp baking soda

½ tsp salt

⅛ tsp ground cloves

Zest of 1 orange

¼ cup orange juice (juice of 1 orange)

1 cup chocolate chips


Method:

  1. Prepare a baking sheet with parchment paper (if you have 2 sheets you can prep two and bake at the same time!)

  2. Cream together butter and brown sugar with either a stand mixer with the paddle attachment or hand mixer on medium-high for 2-3 minutes until it lightens in colour.

  3. Beat in 1 egg for 3-4 minutes (or longer!) - you are looking for the egg to be fully incorporated and the mixture to be light in colour. Should look extra fluffy!

  4. In a medium bowl combine flour, baking soda, salt and clove - whisk together until well combined.

  5. Add flour mixture to butter/egg/sugar mixture, beating on low until just combined.

  6. Add in orange zest, orange juice and chocolate chips, mix until just combined.

  7. Drop spoonfuls onto cookie sheet 1 inch apart - should be about 1.5 tbsp in size (they are smaller cookies). You will likely need two cookie sheets, so you can either do this in rounds or bake two at the same time, swapping their position in the oven halfway through.

  8. Bake at 375F for 10-12 minutes until starting to turn golden brown. Let cool on the cookie sheet for a few minutes before transferring to a rack.

Mocha Almond Cookies (Gluten Free)

545E0B27-7D33-4CC1-96DA-D82F48C38C25.JPG

These cookies are like if a brownie and an almond cookie had a baby. Not too sweet, more cake-y than cookie, they are a quick and easy (+gluten free) dessert. I have a sincere love/hate relationship with baking. The precision of traditional recipes can sometimes be too much for my patience. What if I forgot to leave the butter out and it’s not room temperature? Soften in the microwave for a touch too long and your butter is melted, ruining any chance of a fluffy cream with the sugar. This recipe is designed to be fool proof. Even when I shot these photos I forgot the cocoa powder and had to add it at the end. All was well. That’s my kind of baking!


121BF02A-7A90-40D8-B748-49B6391B42D1.JPG

Mocha Almond Cookies (Gluten Free)

30 mins

Yields: 12-15 cookies


Ingredients:

1 ½ cups almond flour

¼ cup cocoa powder

1 tsp instant coffee

2 tsp baking powder

1 tsp kosher salt

½ cup semi-sweet chocolate chips

¼ cup unsalted butter

¼ cup natural almond butter

1 egg

⅓ cup white sugar

1 tsp vanilla


Method:

  1. Preheat oven to 375F. Prepare a cookie sheet with a silpat mat or parchment paper.

  2. In a small mixing bowl, whisk together the dry ingredients (almond flour, cocoa powder, instant coffee, baking powder, kosher salt). Set aside.

  3. In a microwave safe bowl add the semi-sweet chocolate chips, butter and almond butter.  Microwave on medium-high in 45 second increments (likely only need 2) until the chocolate chips and butter melt.

    • Stir in between to combine - it may look like the chocolate isn’t fully melted but when you stir they may melt into the heat. Stir until smooth. Set aside to cool for 5 mins.

  4. In a large mixing bowl whisk together the egg, sugar and vanilla until combined.

  5. Pour your melted butter/chocolate mixture into the egg mixture, and stir until smooth.

  6. Add your dry ingredients and fold in until everything is well incorporated.

  7. Scoop 1.5 tbsp portions and roll each into a ball. Place onto prepared cookie sheet and press down with three fingers to slightly flatten. Cookies won’t spread much but leave 1 inch in between.

  8. Repeat for 12-15 cookies.

  9. If desired, top cookies with flaky sea salt or a little extra kosher salt.

  10. Bake in preheated oven for 12 minutes.

  11. Allow to cool on the sheet - enjoy!


Ultimate Rice Krispie Squares

2CC210DB-A2A4-4773-8F6B-47196E8A0826.JPG

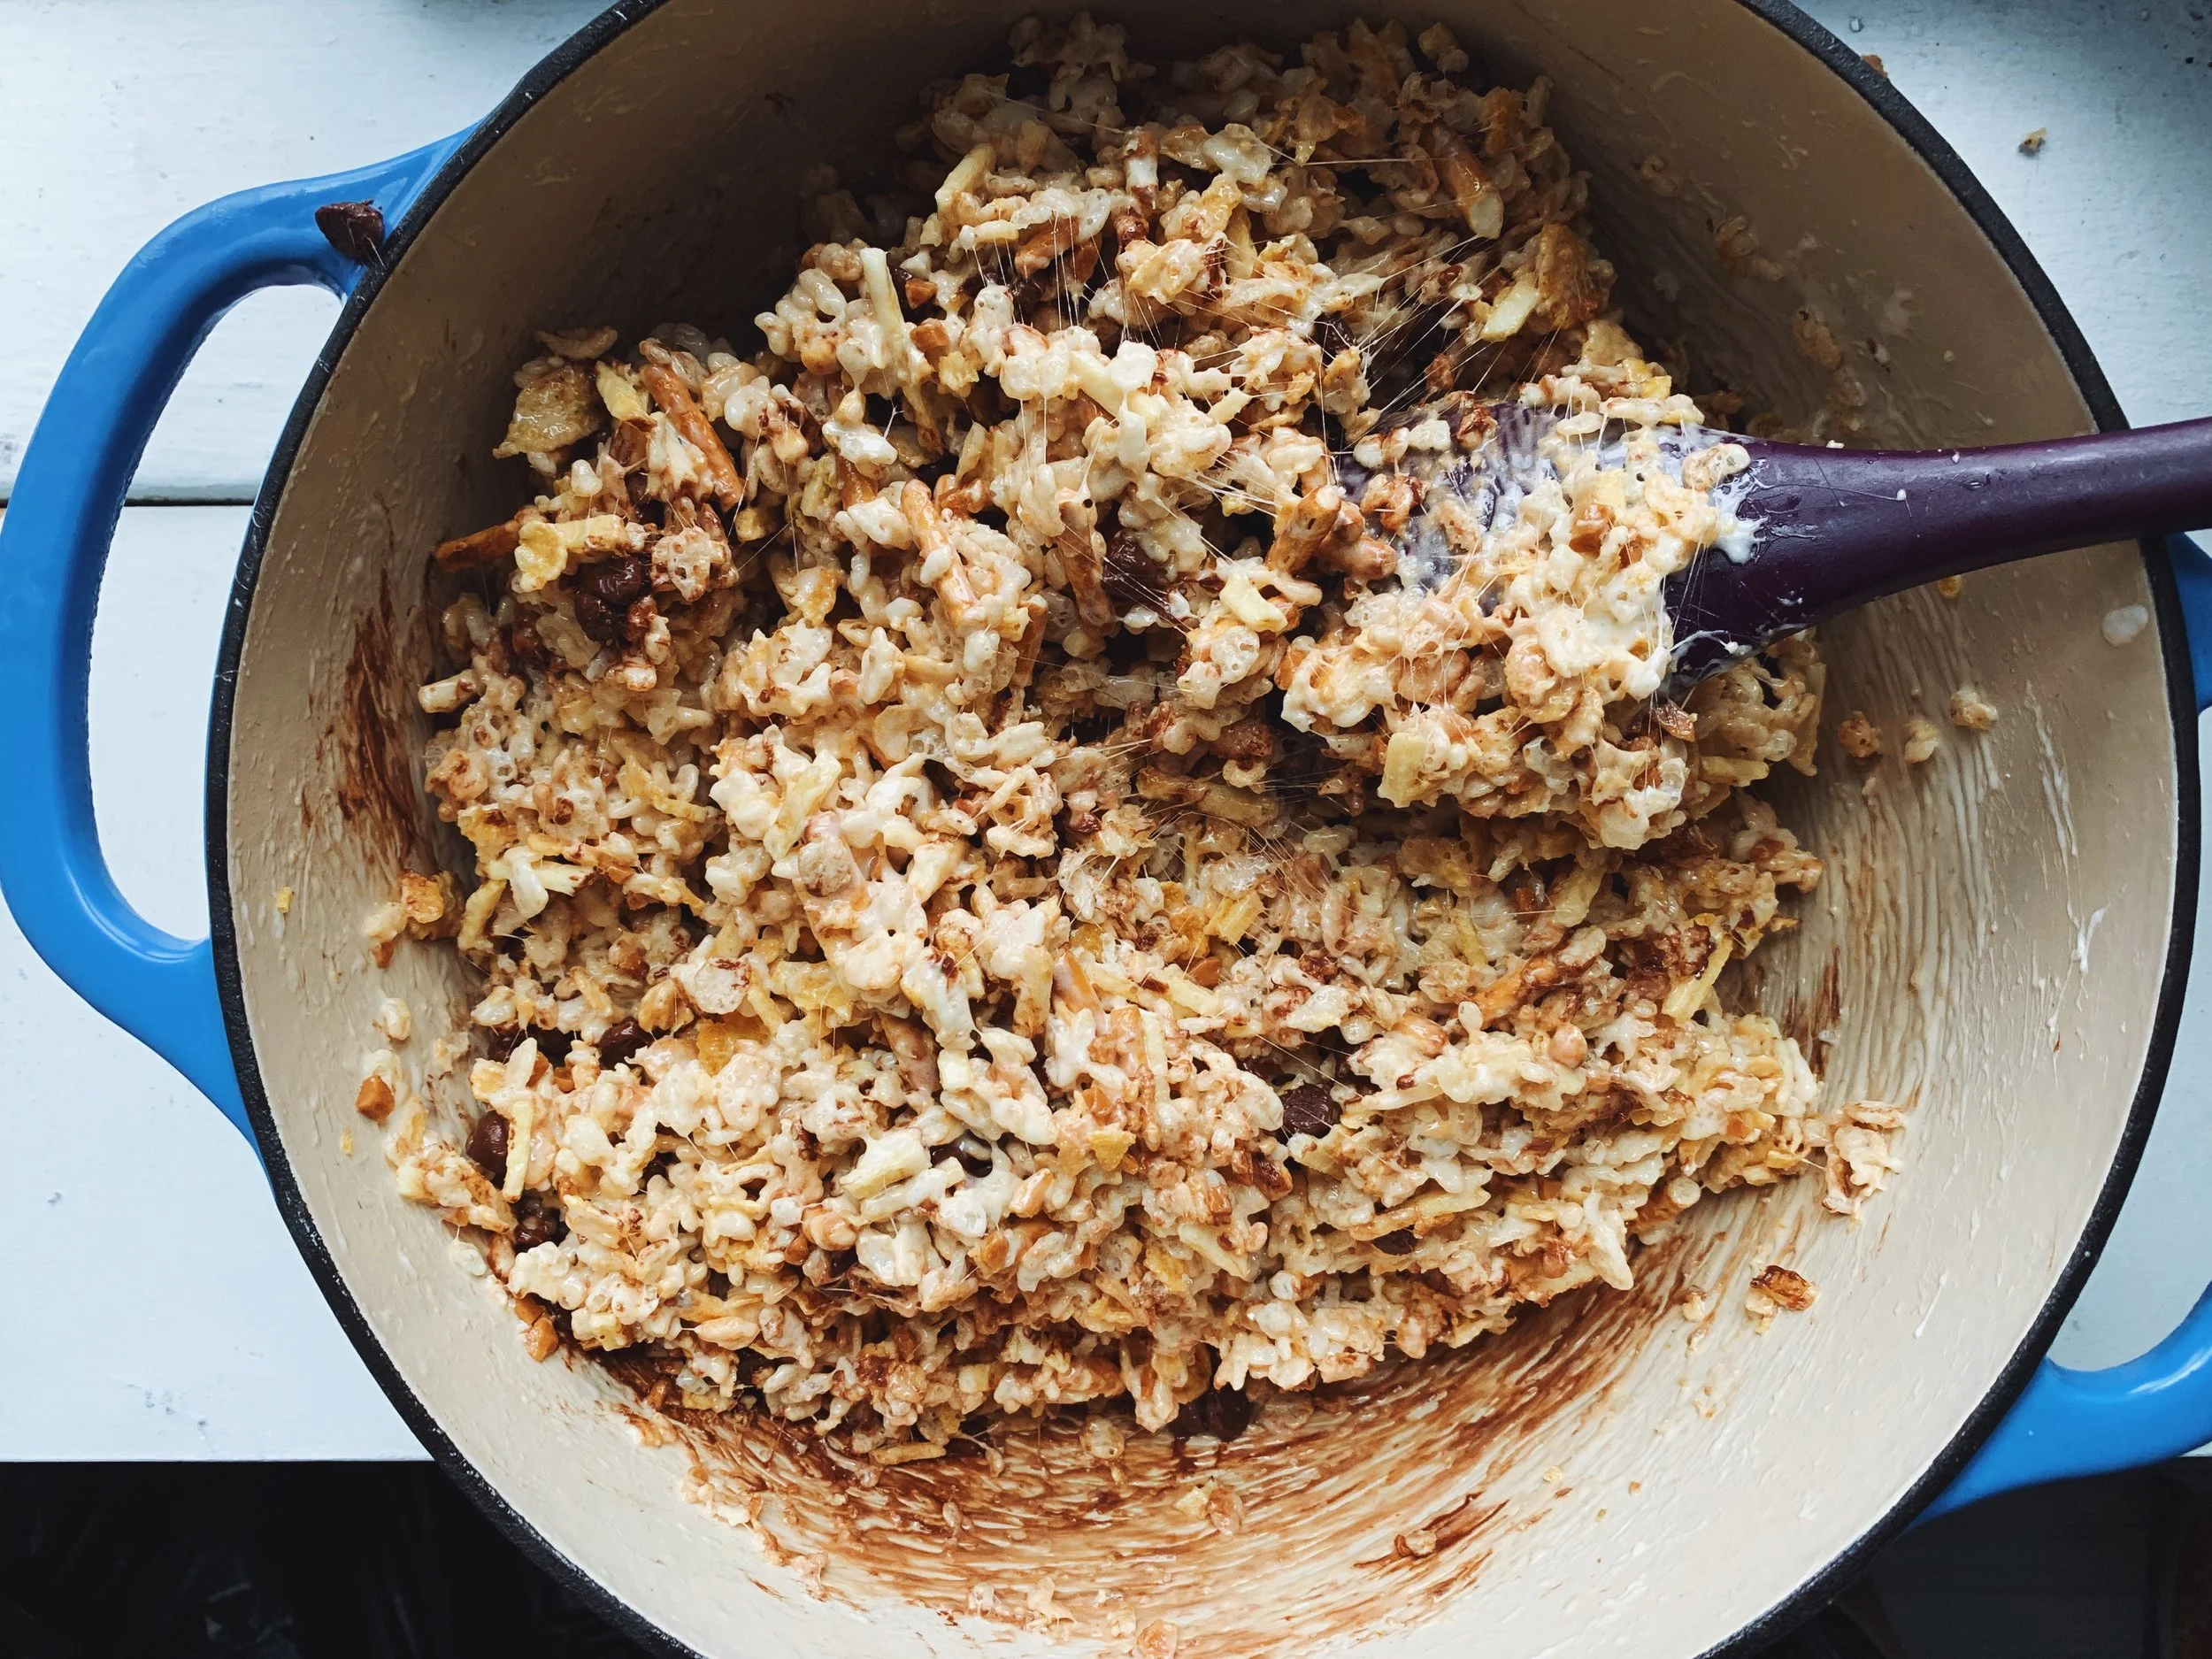
My mom used to always make Rice Krispie squares for my brother and I, and they were the BEST. I always wondered why my mom’s tasted so much better than any other Rice Krispie squares that other moms made, and I still don’t really know. She probably made them once a week, and in preparing this recipe, her and I reminisced, guessing how many batches of these she sent up to Antigonish (2 hours away from home) while my brother and I were in university. She used to always put semi-sweet chocolate chips in her squares, making them perfect with a big glass of milk.

Back in 2015 I bought Milk Bar by Christina Tosi, and quickly became obsessed with her ability to bring together nostalgia and perfectly seasoned sweets for that ideal sweet and salty bite. Inspired by Tosi’s “Compost Cookie (R)”, I started adding pretzels, potato chips sticks and corn flakes to my squares. The result is a more grown-up flavour but the same familiar taste of my mom’s Rice Krispie Squares. Enjoy!


Ultimate Rice Krispie Squares

15 minutes, 20 minutes to cool

Pro-tip: the first 3 ingredients you can buy at the Bulk Barn or your local bulk store, rather than buying full packages

Ingredients

1 cup salted pretzels sticks

1.5 cups potato chip sticks

2 cups corn flakes

5.5 cups Rice Krispies

½ cup butter, unsalted (if using salted, do not add kosher salt)

1 tsp kosher salt

~55 marshmallows (about one large bag)

1 tsp vanilla extract

¾ cup semi-sweet chocolate chips

1/3 cup Skor toffee bits


Method

  1. Prepare a 11 x 17 pan by greasing generously with butter.

  2. Mix together the first three ingredients (pretzels, potato sticks, corn flakes), crushing with your hands to make them smaller pieces (but not dust). Add in Rice Krispies and stir until uniformly mixed.

  3. In a large bowl, melt the butter in microwave*. Add in the kosher salt.

  4. Add in marshmallows and microwave in 30 second intervals until marshmallows have puffed up / are melty and can be stirred to incorporate into butter. Stir in vanilla extract and continue to stir until smooth. Be ready to move quickly to step 5 otherwise your marshmallow mixture will harden.

  5. Moving quickly, stir in dry ingredient mixture to the marshmallow sauce until fully coated. Add in the chocolate chips and skor bites last to prevent too much melting, folding until uniformly mixed.

  6. Press into the prepared pan (coat your hands with butter so the mixture does not stick to your hands, or use a piece of parchment paper to press down).

  7. Refrigerate until hardened. Store in fridge for up to 5 days.

*If you’re like me and somehow have reached adulthood without a microwave safe mixing bowl, you can also do this on the stove top. Start by melting the butter over medium heat, and then keep a very close eye when you add in the marshmallows. Stir often once the marshmallows are in to prevent sticking - remove from heat once it becomes smooth and uniform, before adding in the vanilla.