christmas

Tourtiere Bites

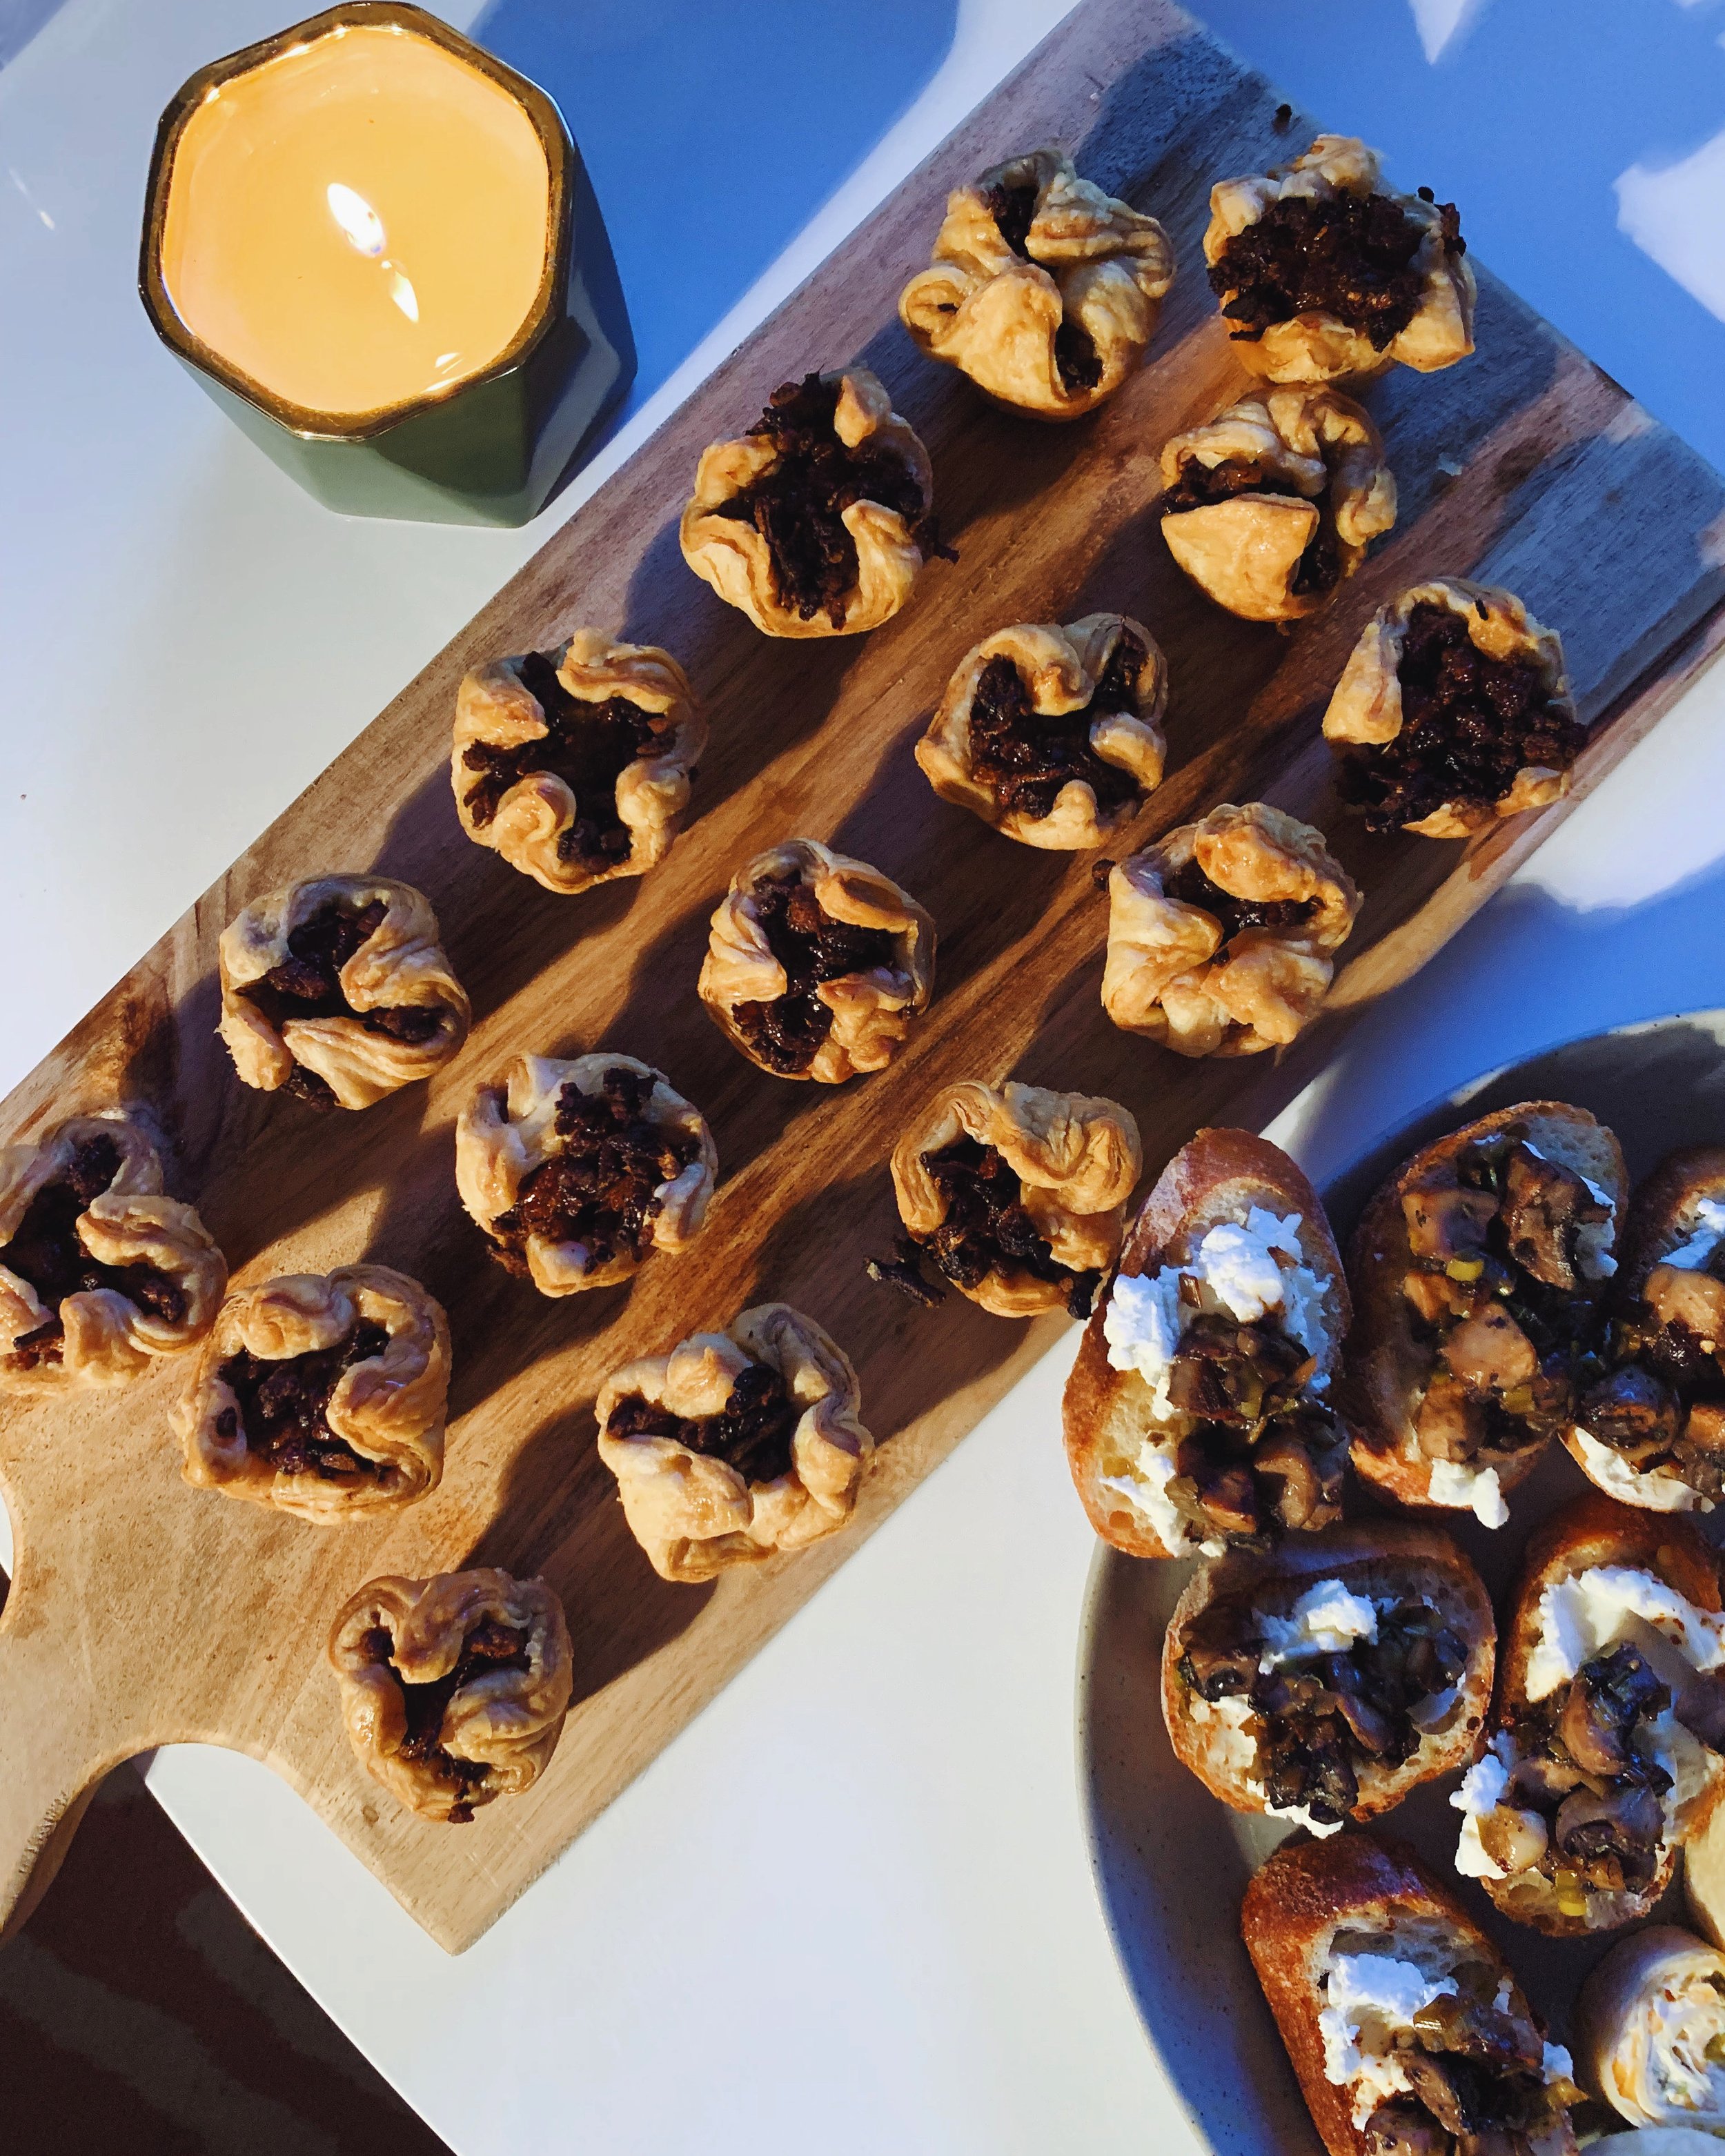
I absolutely adore tourtiere and I plan on *finally* publishing my recipe for the real deal this year. I’ve been working on that recipe for 5+ years and it’s so dear to me. I want it to be perfect for everyone so you can enjoy the same warmth and love of each bite that I do, but I think I’ve been kind of stuck trying to make it perfect so it’s time to put it out there! In the meantime, I adapted my recipe for a smaller format, especially since many people’s holidays will be smaller this year. These little bites have all the flavour of the larger pie but come together much more quickly, and don’t require pie dough!

My favourite part of these tourtiere bites is taking the method from baklava where you pour honey syrup while they are still piping hot; pouring the maple syrup over the bites right when they come out of the oven gives a sweet little crust making them extra addictive. 

I hope you enjoy these little bites this holiday season!


Tourtiere Bites

This yields 16 bites, you could easily double if you have a larger crowd.

1-1.5 hour (30 min prep, 30-40 min cooking)

Tools needed: mini-muffin tray

Ingredients:

1 tsp olive oil

1 small white onion, finely diced  (~½ cup)

1 clove of garlic, minced

½ lb ground pork

⅛ tsp ground nutmeg

⅛ tsp ground cinnamon

1/16 tsp ground clove (I just eyeballed a half of a ⅛ measuring spoon)

Salt and pepper

1 small potato grated (~ 1 cup)

1 sheet puff pastry, thawed (½ a package)

2 tbsp maple syrup


Method:

  1. Preheat oven to 375F.

  2. Heat a pan to medium-high heat, add the oil and the diced onion and minced garlic. Sautee until softened, about 5-7 minutes.

  3. Add in the ground pork and spices, allowing the pork to brown and cook through (you don’t need to disturb it too much). About 5 minutes.

  4. Once the pork is cooked, add in the grated potato. There should be enough pork fat in the pan but if needed you can add more olive oil. If it dries out add a tbsp of water. Continue to cook until the potato is tender, about 10 minutes. Season well with salt and pepper (it should taste good when you taste!).

  5. Roll out 1 sheet of puff pastry and cut into 16 squares. Place the squares into mini muffin tin and press into the tin leaving the corners hanging. Scoop the filling into the pastry (about 1 tbsp per) until evenly divided. Fold the corners on top of the filling to almost close each mini-pie bite.

  6. Bake for 30-40 minutes until the puff pastry is golden brown. Immediately after removing from the oven pour a little maple syrup over each bite - it will sizzle in the pan and soak into the filling/pastry without getting too sticky.

  7. Serve warm!

Mushroom Tourtiere

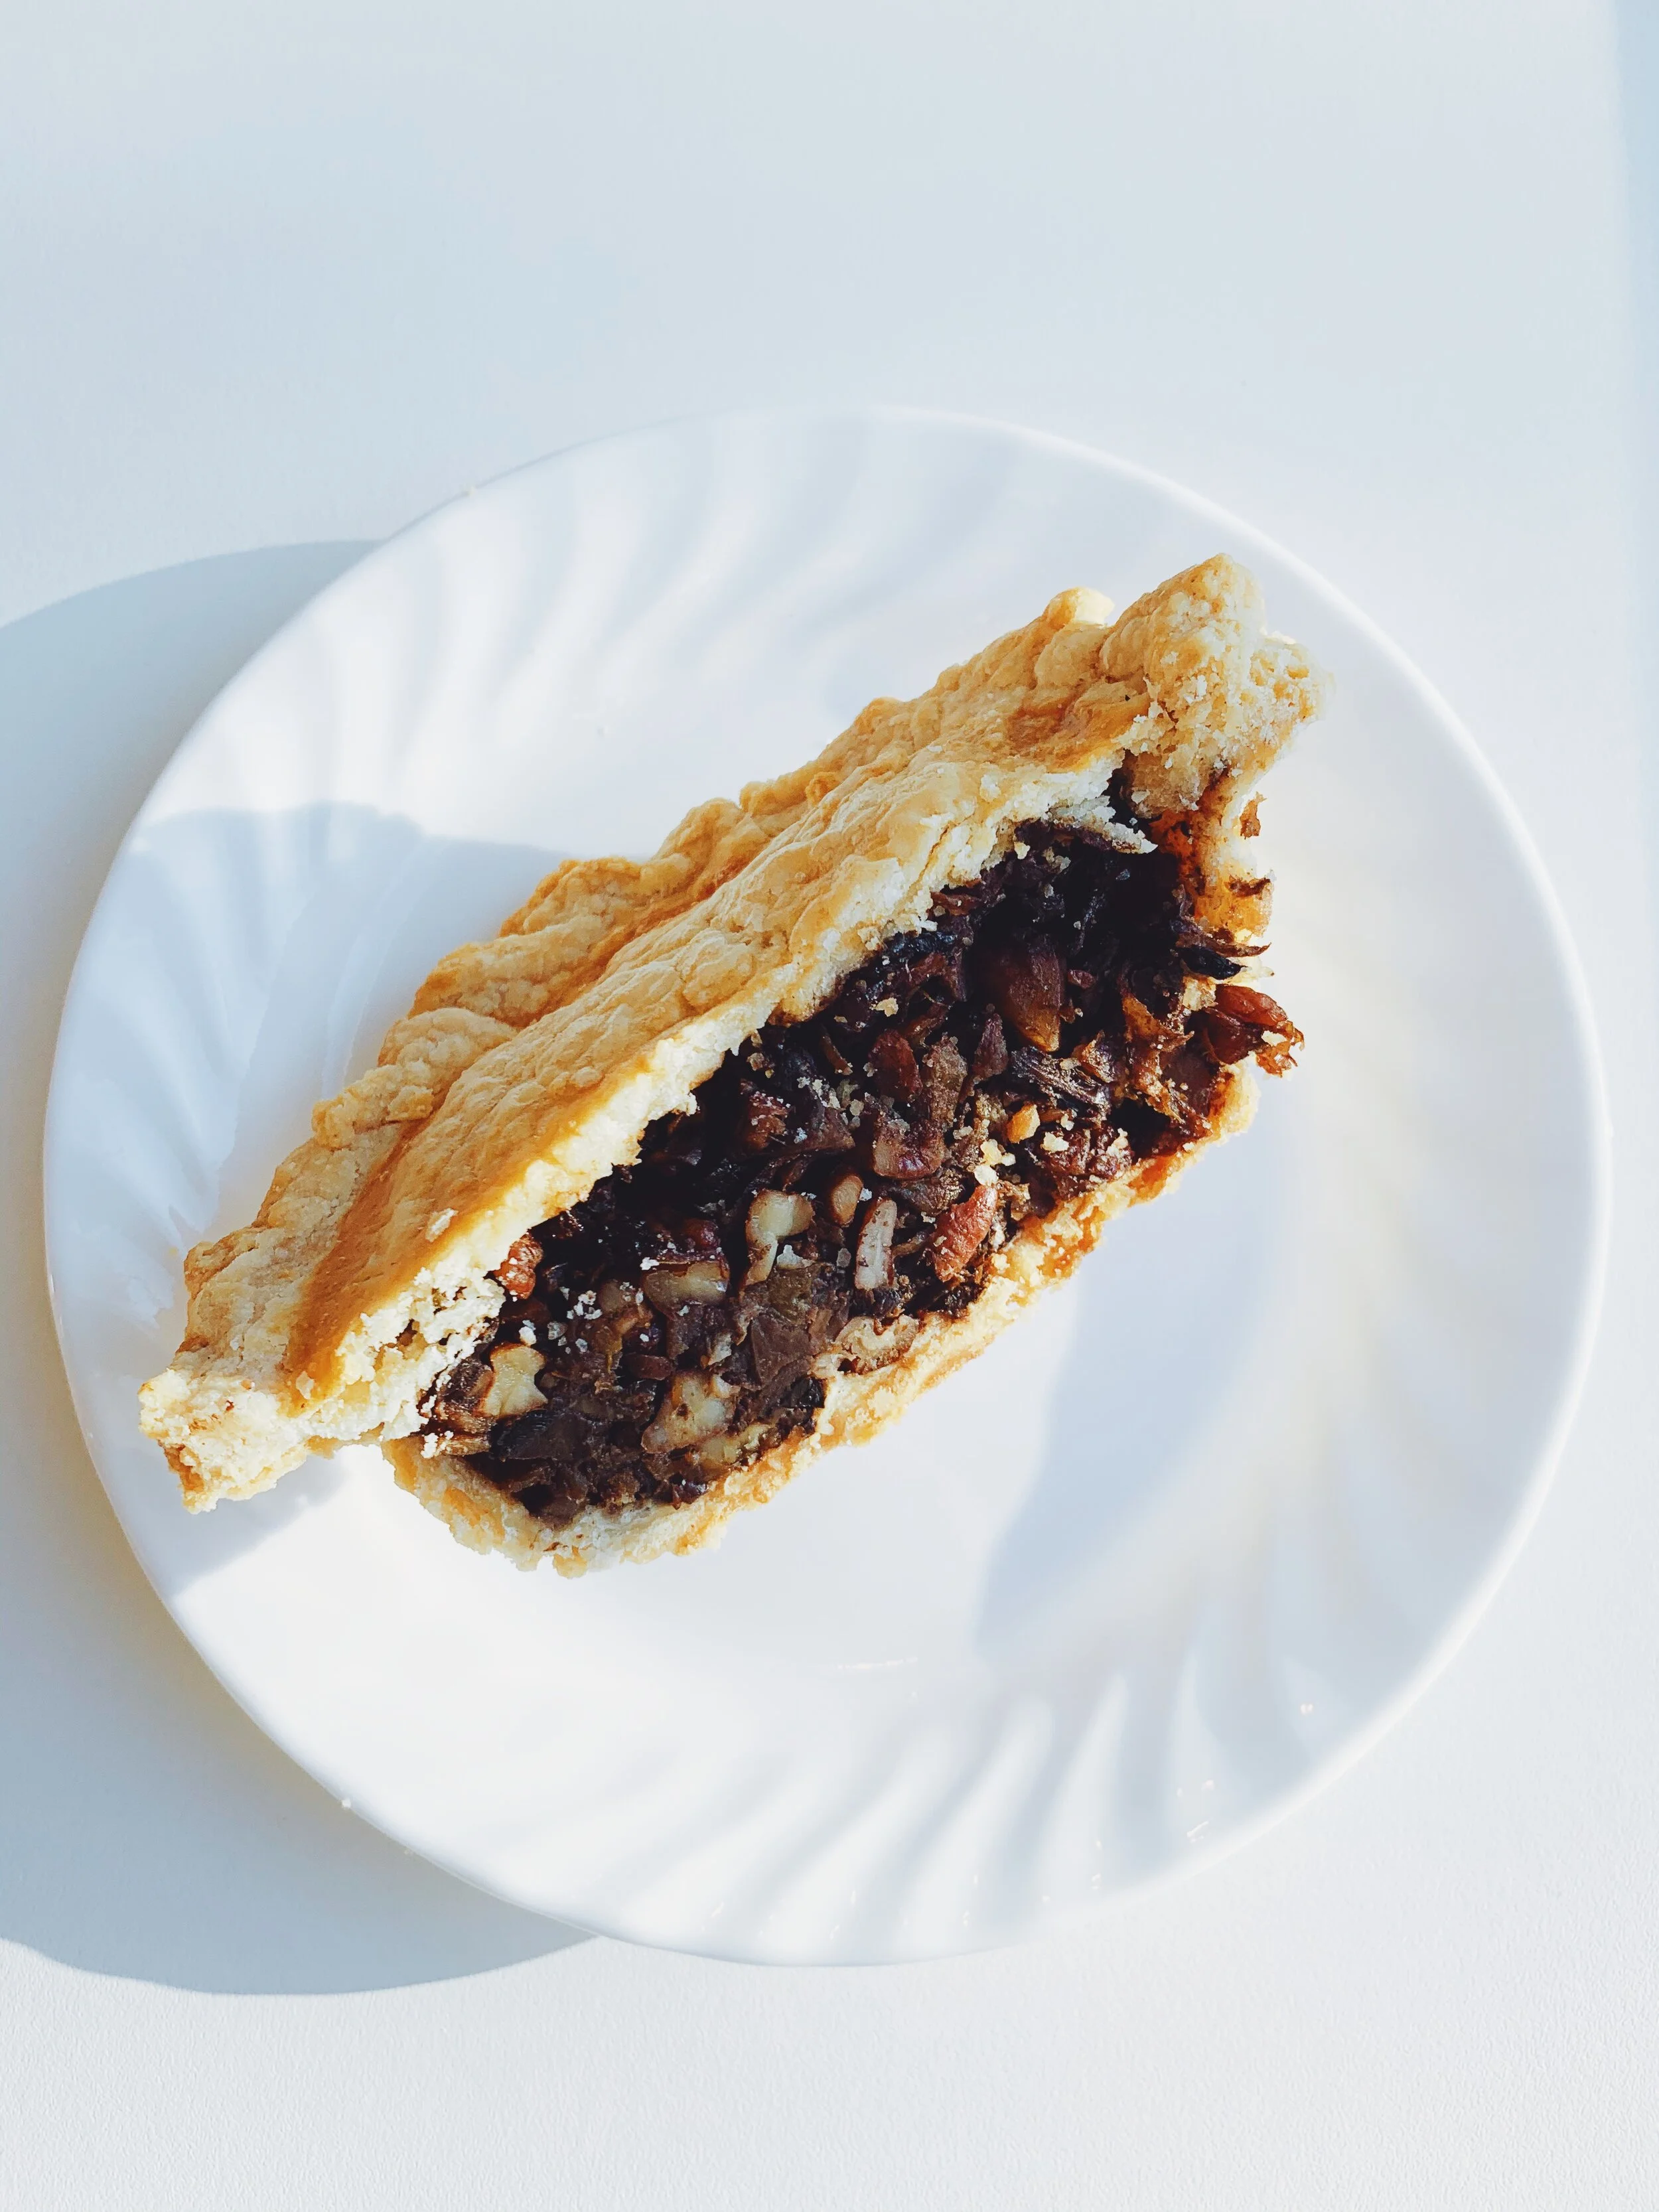
Mushroom tourtiere pie sliced crosswise on a white plate

Meat pies have always been a Christmas tradition in our house. I remember my grandmother used to make rabbit pies on Christmas Eve - she always told me my piece of pie was from the “chicken” pie, bless her. As I got older and more interested in cooking, as well as our Acadian background, I started making tourtieres to enjoy on December 23rd. A new tradition was born, and each year the “tourtiere” night grew as well. One of my dear friends who attends every year is vegetarian, so I’ve been playing around with a veggie tourtiere recipe for the past few Christmases. I wanted it to have the same warming flavour as tourtiere, and for the filling to have a similar texture. The different mushrooms add savouriness, and the variety of nuts add texture (and nuttiness!). Since mushrooms and nuts can be a bit one-note in flavour, I have added a balsamic maple reduction to drizzle over the filling right before it’s baked so that every bite tastes a little different. Some bites you’ll get the reduction, others will just be mushrooms. A new adventure every time! 

Tips for the pie

Cut everything into equal sizes

To replicate the texture of a pie with ground meat, I try to cut my mushroom, celery, leeks and nuts into relatively equally small pieces. This gives it a bit of a crumbly texture, and then the grated potato with the broth helps hold the filling together.


Do not disturb the mushrooms

Mushrooms have the ability to get a deep brown colour to them if they aren’t fussed with too much. Once you add in your mushrooms to the pan, walk away! It’s always tempting to stir and move around food in a pan, but letting the mushrooms sit undisturbed will allow them to get a nice, deep colour (which means more flavour!).


Serve it with a nice, bright salad

The pie is pretty heavy, so a bright, acidic salad will pair well with this. My Go-To Winter Salad is a perfect partner. Even some simple arugula dressed with lemon juice, olive oil and salt and pepper would be great! 


Mushroom Tourtiere

Makes 1 x 8 inch pie, or 2 x 4 inch mini pies

2 hours total, assuming your pie crust dough is ready/chilled

Ingredients:

Filling:

1-2 tbsp butter

1 tbsp olive oil

3-4 cups of diced mixed mushrooms - (I did 1 portobello mushroom, 1 large oyster mushroom and 1 pint of shiitake)

2 celery stalks, finely diced

1 leek, sliced

¼ cup chopped pecans

¼ cup chopped walnuts

½ tsp dried thyme

¼ tsp ground cinnamon

⅛ tsp ground clove

⅛ tsp ground nutmeg

1 potato, grated

⅓ cup vegetable broth

2 pie crusts (here are my two go-to recipes: all butter or butter/shortening)

Optional: balsamic maple reduction

¼ cup balsamic vinegar

1 tbsp maple syrup


Optional: egg wash

1 egg

2 tsp water


Method:

Make the filling:

  1. In a cast-iron pan or frying pan, heat 1 tbsp of butter and 1 tbsp of olive oil over medium heat.

  2. Add in your leek and celery, cooking for 3-5 mins until softened. Season with a pinch of salt.

  3. Add in your mixed mushrooms. DO NOT DISTURB. Allow to brown on one side for 4-5 mins before stirring. Then DO NOT DISTURB. If you move mushrooms too much they release liquid and steam vs. brown. Once your mushrooms are perfectly browned, move to the next step.

  4. Add in your chopped nuts and spices, giving a gentle stir to allow everything to mix together. This is where you could add in the extra 1 tbsp of butter if needed.

  5. After everything is nice and toasty (3-5 mins), add in your grated potato and vegetable broth. Stir to distribute the potato throughout the filling and cover with a lid for 8-10 mins, until most of the liquid is absorbed and the potato is cooked.

  6. Taste and adjust seasoning - does it need more salt? More pepper perhaps? Continue to taste and season until it tastes yummy. Set aside.


Make the balsamic maple reduction:

  • Bring balsamic vinegar and maple syrup to a boil in a small pot over medium-high heat. Keep an eye on it. It will eventually start to thicken, around the 5-minute mark. Remove from heat.


To assemble the pie:

  • Fit the pie crust into the 8-inch pie pan.

  • Add in your mushroom/nut/potato filling. Drizzle the balsamic maple reduction on top of the filling.

  • Top with the second pie crust, sealing your edges and crimping in the style you prefer. 

  • Cut three air holes into the top of the pie.

  • Place the pie in the fridge for minimum 30 mins to allow the pie crust to firm up again. If you put a warm pie crust in the oven you will have a shrunken pie!

To bake the pie:

  • Preheat oven to 375F.

  • In a bowl whisk together 1 egg with 2 tsp of water. Brush the top of the pie with the egg wash.

  • Bake pie for 45 mins - 60 mins until the crust is evenly golden on top and bottom!

  • Serve warm with maple syrup.

Mom's Whipped Shortbreads

IMG_4741.jpg

These are my favourite Christmas cookies. They are super simple and they just melt in your mouth. Perfect with afternoon or after-dinner tea. I like making them small because they are basically just sugar, butter and flour. They are best as a one or two-bite treat! The best thing about these cookies is they are only 4 ingredients, all of which you probably have on hand. They do take some time to firm up after they are baked so I recommend making them at least the day before you plan on serving them to ensure they aren’t too delicate to touch. 

Here are a few common questions on these cookies:

Do I need a stand mixer to make them?

No, but you definitely need an electric hand mixer if you don’t! I think it would be pretty difficult to achieve the fluffy texture you need with just hand mixing. But maybe you are stronger than me!

 Can I use unsalted butter for these?

You could but I recommend using salted butter as it is already perfectly seasoned throughout. Since this cookie has very few ingredients, this is one of the few times I recommend using salted butter instead of unsalted. Usually, I prefer unsalted because you can control the level of seasoning yourself. If you did use unsalted butter, I would add 1 tsp kosher salt.

Do I need to use cherries on top?

No, those are totally optional! I like the festive touch they add but you could do them plain, or go crazy with sprinkles. Just be gentle with toppings as you don’t want to press out any of the air you’ve built up in the dough.

Can I halve the recipe?

Absolutely. This makes about 6 dozen small cookies. All of the measurements are easily halved, so go right ahead. The cookies do freeze well if you want to make the full batch and save some for future you.

Can I pipe these cookies, or use a cookie press?

Maybe? I actually am not confident in this answer so do let me know if you experiment with them! I personally think they are cute and charming as little imperfect blobs. 

 My cookies are falling apart when I touch them!

Be patient with letting them cool. Honestly, even the first day they can be pretty delicate. Once they are fully cooled the cookies are much easier to handle. I prefer to store them in the fridge (or winter garage which is basically a fridge) because I like them cold, but that also helps keep them firm.

 How should I store the cookies?

I prefer the shortbreads cold but they keep well on the counter as well. I like to line my container with wax paper and place a piece of wax paper between each layer of cookies. I find the wax paper protects the cookies if they get moved around at all, and it’s not rough on them so they stay intact better. These also keep well in the freezer.

  • Counter/room temperature: 4 weeks in an airtight container

  • Fridge: 4-6 weeks in an airtight container

  • Freezer: up to 3 months

IMG_4732.jpg

Mom's Whipped Shortbreads

This recipe makes about 6 dozen small cookies. You can halve it easily if you want less.

1 - 1.5 hour total prep and bake time


Ingredients:

1 lb or 454g of salted butter, room temperature

1/2 cup cornstarch

1 cup icing sugar

3 cups all-purpose flour

6-8 Maraschino cherries (if desired)


Method:

  1. Cream together the butter, cornstarch and icing sugar for 1-2 mins until well combined using a stand mixer or hand mixer on medium speed.

  2. Scrape down the sides and add in flour. Start on a low setting until the flour is incorporated and then turn up to medium-high speed for 15 mins. The mixture should almost double in size and look fluffy and cloud like.

  3. Preheat the oven to 350F. Line a cookie sheet with parchment paper (TIP: I prefer to use two cookie sheets so I can put one tray in as soon as the other comes out)

  4. Dice maraschino cherries into 6ths and pat dry with a paper towel.

  5. Drop 1 heaping teaspoon worth of cookie dough onto the cookie sheet. Place cookies 1 inch apart. Try not to disturb the cookie dough too much as you don’t want it to lose air.

  6. Place a piece of cherry on top of each cookie and gently push it into place.

  7. Bake for 10 mins until the bottom is lightly golden. The top of the cookie should not colour much.

  8. Allow to cool on the sheet for 1-2 mins before transferring to a cooling rack. The cookies are very fragile until fully cooled - it takes 30-45 mins for them to fully firm up.

  9. Repeat until all of the cookies are baked.

  10. Store cookies in a container lined with wax paper on the counter or in the fridge (I personally love them cold!)


Maple Sriracha 'Bits and Bites'

IMG-4589.jpg

My mom always made “bits and bites” in December to have on hand whenever people popped in to visit over the holidays. I love the toasty, warm flavour of these, and over the years I’ve started to make them in Toronto for my annual “January Party” with my own twist - adding in maple syrup and sriracha! Even though this year there won’t be parties or company stopping in, these make for a great snack with a movie on a winter's night and they keep super well. If you are doing gift drop-offs for friends, pick up some fun tins from a local shop, and you can gift a homemade treat! 

This recipe makes A LOT, but you can easily half the recipe if desired. I recommend making the full version so you have snacks forever.

IMG-4594.jpg

Maple Sriracha ‘Bits and Bites’

Yields .. a lot. Like 40 cups worth. 3.5 hours total prep/bake time.

Ingredients

Maple Sriracha Sauce

3 tbsp sriracha 

3 tbsp maple syrup 

¼ cup Worcestershire sauce

1 tbsp garlic powder

1 tbsp onion powder

1.5 cups salted butter, melted (if using unsalted butter, add 1 tbsp kosher salt)

Bits and Bites Components 

1 550g box Shreddies = 11 cups

2 200g boxes Cheese Nips  = 7 cups

1 400g bag Stick Pretzels = 8 cups

1 700g can Honey-Roasted Peanuts = 5.5 cups

½ 570g Family Size box of Cheerios = 10 cups


Method

  1. Preheat oven to 250F

  2. In a medium bowl, whisk together the sauce ingredients until smooth and well emulsified.

  3. Mix together your “bits and bites” components into two large roasting pans. You can also use tin foil pans (I would use the roasting pan sized ones). You want to ensure there is room in both roasters to easily stir - this will help with your stirring and also allow the air in the oven to circulate better to dry out the mixture!

  4. Pour your sauce over both pans, evenly dividing the sauce. Give the mixture a good toss so everything is evenly coated - you don’t want the sauce concentrated in one area!

  5. Bake in the oven at 250F for approximately 3 hours, tossing every 45 mins. Make sure you stir all the way to the bottom otherwise the pieces on the bottom will burn.

  6. You are looking for the bits and bites to be dried out - you don’t want any soggy pieces. If the mixture isn’t fully dried out after 3 hours, reduce the heat to 225F and continue to bake until everything is perfectly dried and toasty!

  7. Remove from the oven and allow to cool completely.

  8. Store in an airtight container on the counter. They will keep for 1-2 months!