Last May, my dear friend and I travelled to Portugal for 2 weeks. We ate… a lot, and I’ve been so inspired by the food of Portugal since that trip. When we were in Lagos, we took a day long cooking class in the countryside (New Forest Lodge Country Cooking Class) and it was a dream come true. A day spent on an organic farm cooking with a truly lovely woman named Frances, making fresh bread and various dishes all while enjoying the fresh air and a glass of wine. It was relaxation at its finest. One of the first dishes we made was a sweet potato dip with fresh breadsticks. I kept referring to it as “guacamole with sweet potato”, because the ingredients are quite similar to a good guac. That day we used steamed sweet potatoes, but since returning home I’ve been roasting them. I find roasting reduces the liquid in the sweet potatoes and results in a sweeter, more flavourful dip. The key is to let the sweet potatoes roast until you see that caramel start to peek out of the skin.
My favourite way to serve this is with fresh tortilla chips, but store bought work all the same!


Above are images from our day in Lagos cooking with Frances - our beautiful breadsticks and the original Sweet Potato Dip!
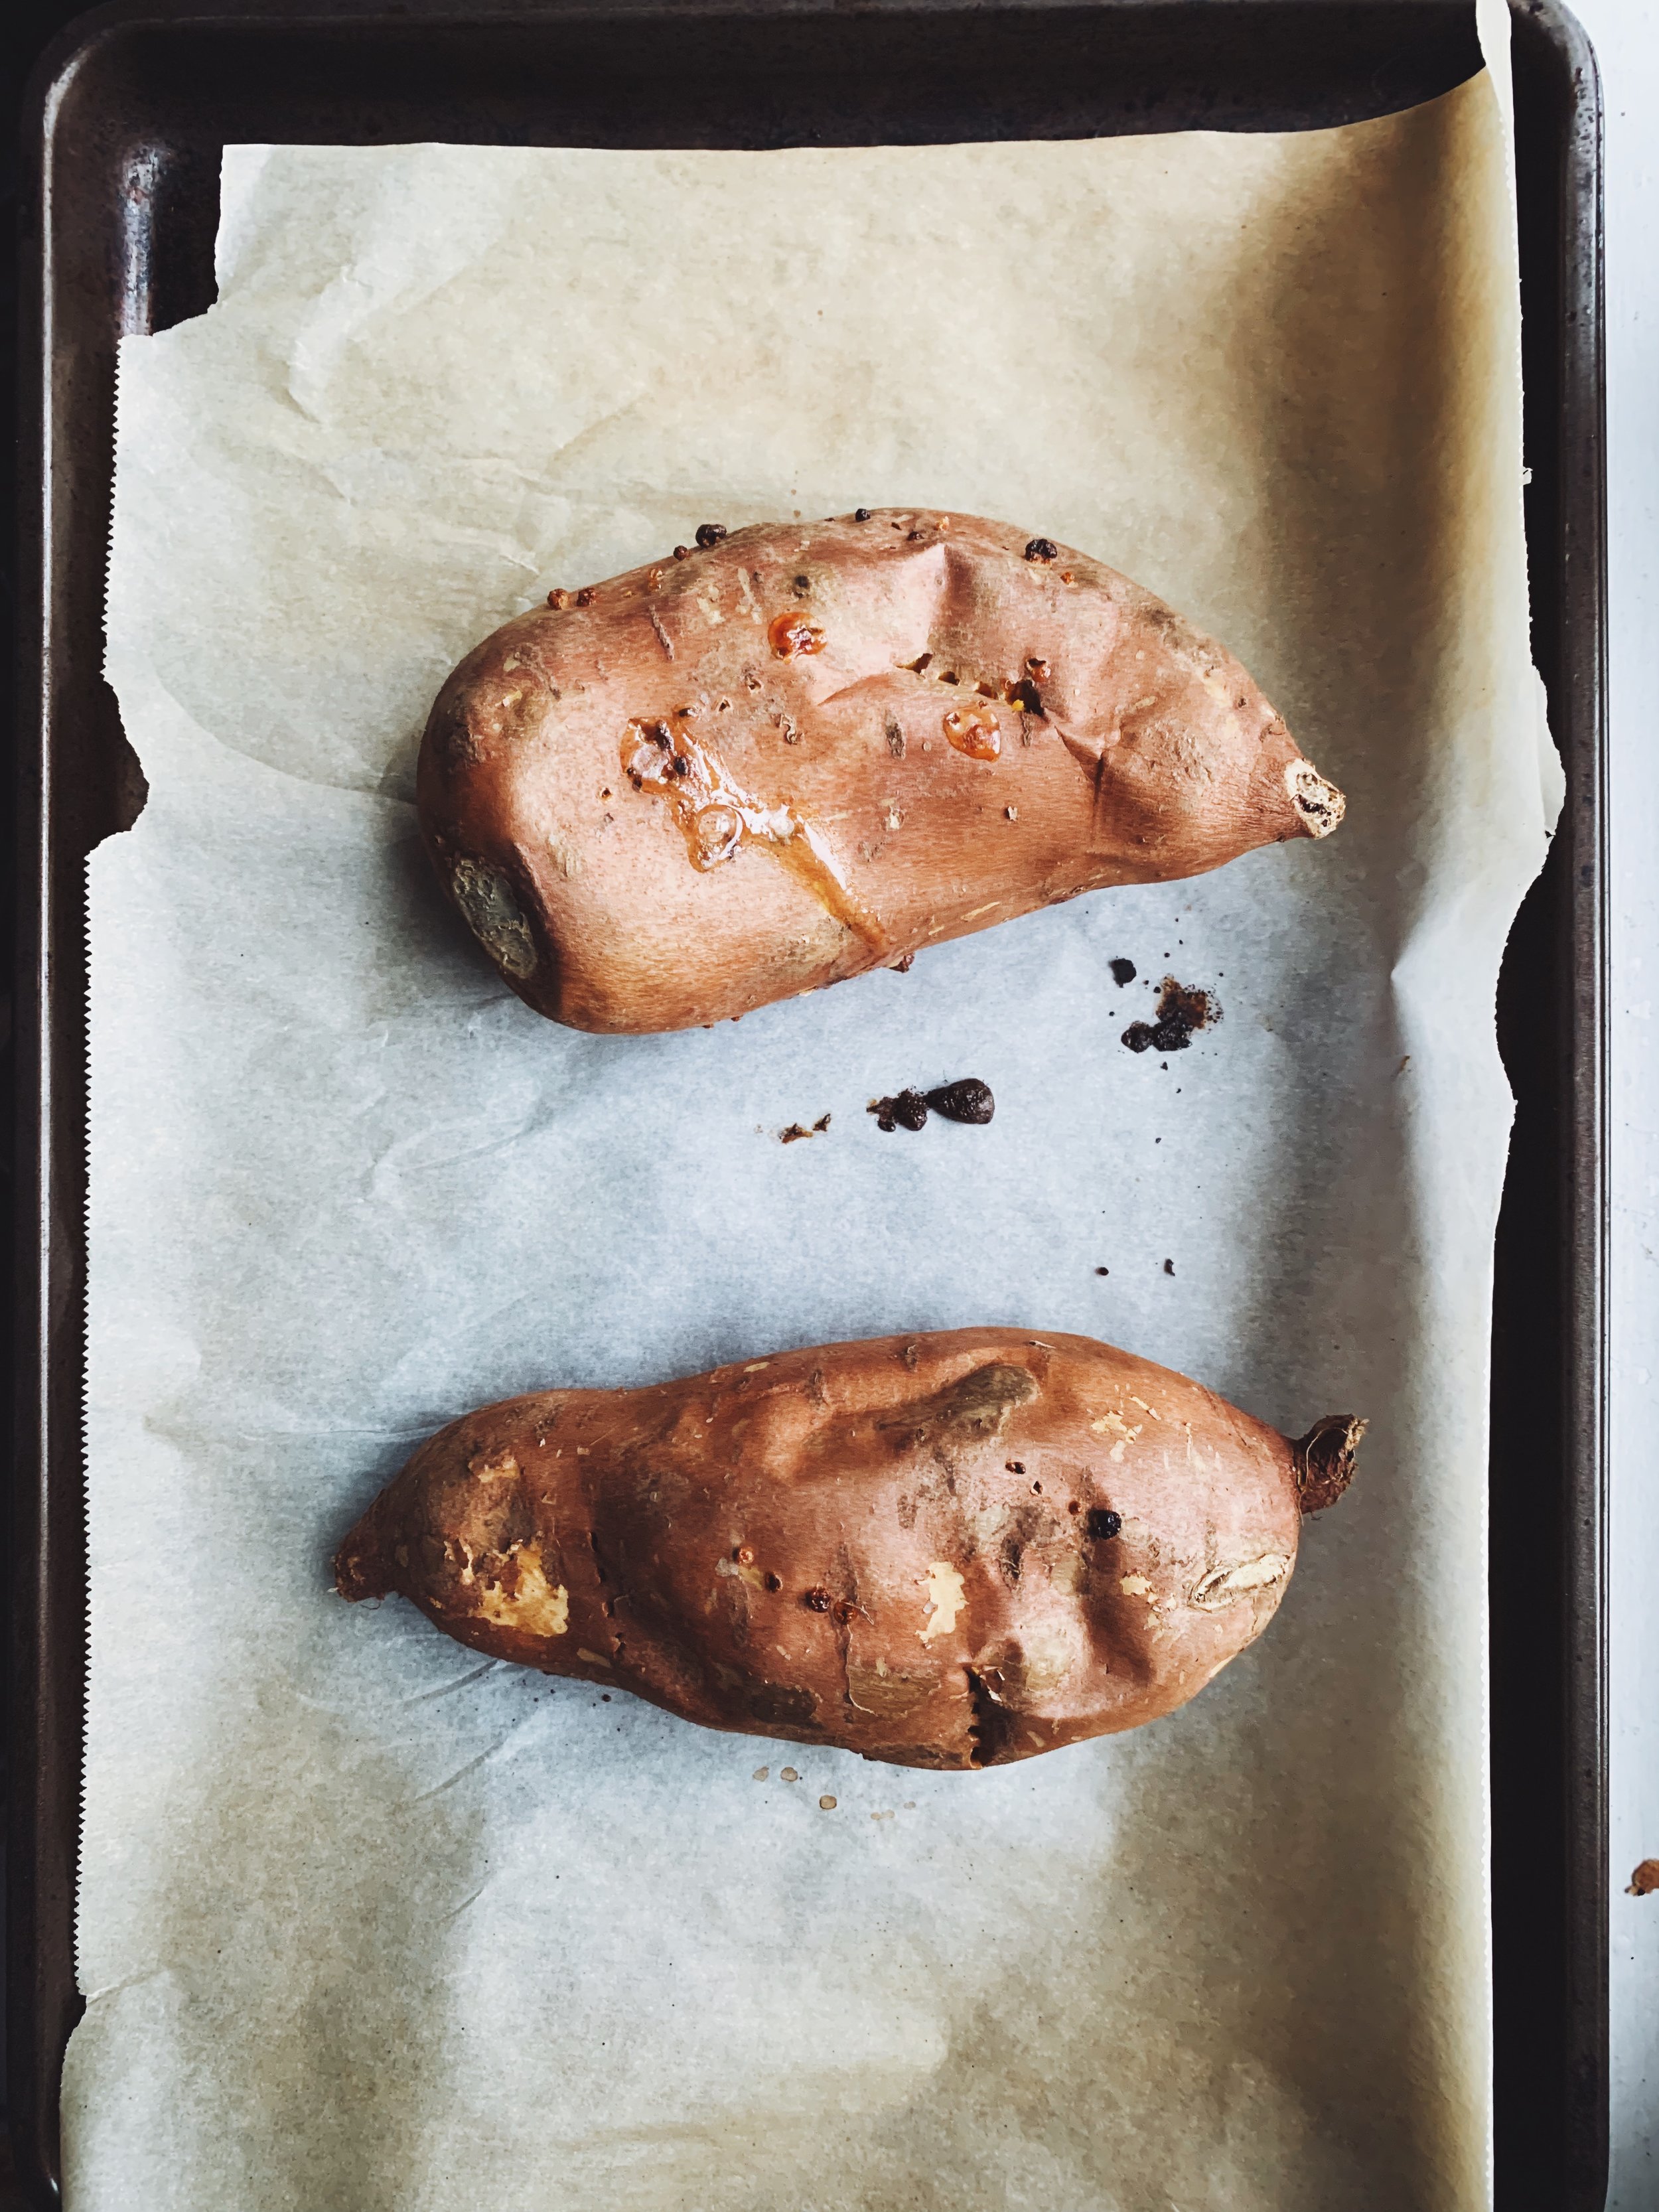
Perfectly roasted sweet potatoes - oozing caramel


Roasted Sweet Potato & Lime Dip
1.25 hours total
ingredients:
Dip:
¼ tsp red chili flakes (or sub in your favourite chili oil to taste)
½ tsp kosher salt
1 clove of garlic, minced
2 handfuls of cilantro, chopped (about ½ cup)
1 lime juiced, about 2 tbsp
2 medium sweet potatoes (~1 kg or 2 lbs)
1 tbsp of olive oil for finishing
Tortillas:
1 package corn tortillas (La Tortilla Factory Yellow Corn & Wheat are my favourite)
2-3 tbsp of coconut oil
Kosher salt
Chili powder (I prefer ancho chilli powder for extra smoke and heat)
Method:
Dip prep:
*you could roast your potatoes ahead of time and store them in the fridge until ready to make the dip. Steps 1-4.
Preheat oven to 400F.
Wash your sweet potatoes and pierce repeatedly with a fork (this will prevent them from exploding) and place onto a baking sheet with parchment paper.
Place into the preheated oven and roast for 45-60 mins, until the potatoes are fork tender, caramel is oozing out, and the sweet potato almost looks like it is collapsing on itself.
Set aside and cool - cutting them open will speed up the cooling process (releases steam).
Once the potatoes have cooled enough to touch, scoop out the insides into a bowl and mash until smooth
Add in your chilli flakes (or oil), kosher salt, garlic, cilantro and lime juice.
Top with your favourite olive oil
Serve room temperature or chill until ready to serve!
Tortilla prep:
Heat a pan to medium-high heat and add in 1 tsp of coconut oil
Place in one tortilla and let it crisp (1 minute), until it starts to puff slightly
Flip to the other side, and cook until crisp (1 minute)
Transfer to a paper towel and sprinkle with kosher salt and chili powder while still hot (do your best salt bae, you want an even distribution and not too much, so sprinkle from a high height)
Repeat with all of your tortillas
Slice into triangles and serve with the drip