appetizer

Bean and Corn Dip

This recipe is far from original - if you google “Texas Caviar” or “Cowboy Caviar” you’ll find tons of recipes for a similar dip. I first had this when my roommate back in 2014 made it for her sister’s birthday (hi Renee!). I am such a sucker for “fresh” appetizers at parties - veggie trays, anything with cucumber, salad rolls, etc. I think it’s because I’m always slightly dehydrated? Appetizers with lots of fresh flavour I gravitate towards. I remember the night I first tried this I kept going back for more. It’s tangy, fresh, and slightly addictive. I’ve been making versions of this recipe ever since and it’s always such a hit. It also keeps for 4-5 days in the fridge, and IMO gets better with time as the flavours sit together. I love it for lunches with tortilla chips, on top of a taco salad, or in wraps. It is also so great for summer parties because the frozen corn kind of cools it from within. I hope you enjoy this tasty bean dip for your next get-together!


Tips

Small Dice Your Veggies for Optimal Dipping Experience

This dip is great scooped up with tortilla chips so you want to make sure your veggie pieces are small enough so you get lots of variety in each bite.

Frozen Corn

I personally just like to add the corn frozen straight into the dip, and then let it thaw once mixed. I find it doesn’t take time to thaw and it keeps everything else a little cool while it sits at room temperature. If you are making this right before serving, you could cook the frozen corn according to the package and then let it cool to room temp before mixing with everything else. 

Dicing Tomatoes

I like to remove the seeds so the dip isn’t too ‘soupy’. To do this I cut the tomato into quarters and use a spoon to scoop out the watery seed parts. I then dice the flesh of the tomato.

Bean Substitutions

I have accidentally made this dip with chickpeas, kidney beans, and white beans (I have trouble reading bean can labels). All turned out great! I think any canned bean works here.

Storing

This keeps well in the fridge for 4-5 days in an airtight container. I sometimes make this the day before serving so it marinates overnight.

All the veggies chopped pre-mixing!


Bean and Corn Dip

Good for a crowd, 20 min prep

Ingredients:

1 can black beans, drained and rinsed

1 can lentils, drained and rinsed

1 cup frozen corn

2-3 medium tomatoes, fine diced (I like to remove the seeds so it’s not too soupy but you don’t have to fuss about this)

1 pepper (red, orange, yellow, green - whichever colour you prefer), fine diced

3-4 green onions, green parts thinly sliced

¼ cup apple cider vinegar

2 limes, juiced

¼ cup olive oil

¼ tsp kosher salt

Pinch of each ground cumin, garlic powder, chilli powder (adjust to taste)

A few shakes of tabasco or other hot sauce

Optional: a squeeze of honey or maple syrup

Optional: handful of fresh cilantro, diced

Method:

  1. In a large bowl combine your drained and rinsed beans and lentils, frozen corn and chopped veggies (tomato, pepper, green onion).

  2. In a small bowl or mason jar, combine your apple cider vinegar, lime juice, olive oil, salt, spices and hot sauce. Whisk well to emulsify (or if using a mason jar, seal tightly and shake). 

  3. Pour over your bean mixture and mix well to combine. If using cilantro, add it in. 

  4. Taste - does it taste good, like you need to take another bite? If not, you may need a pinch more salt. Does it need more spice? Add more tabasco. Need a little more sweetness? You could add a drizzle of honey or maple syrup, or add in more frozen corn!

  5. Serve with tortilla chips!

Tortilla Roll-Ups

This recipe is influenced by all the delicious pinwheels/tortilla roll-ups I’ve eaten throughout my life. I feel like every holiday gathering growing up had some form of tortilla roll-up - whether it was a sweet version with cranberries or spicy like these. This is far from an original recipe, just simply my version of the very popular appetizer. I love these with the spice of the pickled jalapeno, freshness of the red pepper and savouriness of the green onion. You can play around with the ratios to get the perfect bite for you depending on how spicy you like your food. These are super easy to make and always go quickly at parties and gatherings. 

A few tips:

Cream Cheese

You can use either the spreadable cream cheese in the tub or the block of cream cheese, both work fine! If using the block, I would let it sit at room temperature for 30 mins to an hour to soften slightly, which will make it easier to mix. 

Making Them Ahead of Time

A few options for prepping these ahead of time:

  • You can make the mixture up to 3 days ahead of time and refrigerate that, assembling them the day you are going to serve.

  • You can make the mixture and roll up the tortillas, refrigerating well wrapped 1 day ahead of time, then slicing to serve. I wouldn’t roll them up too much more than 1 day ahead of time because you don’t want any moisture getting into the flour tortilla and becoming soggy.


Tortilla Roll-Ups

Yields 4-6 tortillas x 6-8 bites per, ~36-48 bites!

Ingredients:

1 package of cream cheese - you can do either the hard block or the softer spreadable version

3 green onions, green parts finely diced

½ red pepper (or orange or yellow), finely diced

2-4 tbsp pickled jalapenos, drained and diced

1 cup old cheddar cheese, grated

1 package large flour tortillas (10”)

Pinch of salt and pepper

Method:

  1. In a medium bowl combine the cream cheese, green onions, red pepper, pickled jalapeno and cheddar cheese in a bowl and mix together to combine. If easier, you can use an electric hand mixer to mix everything together. Sometimes I use a little bit of the jalapeno liquid to loosen up the mixture - you want it to be spreadable! 

  2. Take a taste and adjust - I personally like them medium spicy but you can always add more jalapeno. Season with salt and pepper if needed.

  3. After it’s all mixed together, scoop a scant 1/4 cup and spread thinly onto a tortilla, trying to get as close to the edges as possible. Roll tightly. I sometimes have to add a little of the mixture to the top edge to have it close well.

  4. You can store them rolled in the fridge covered in plastic wrap and then slice them into 1.5 cm rounds when ready to serve. The ends make for a great *chef snack*.

Chorizo Stuffed Dates with Bacon and Spicy Marinara

IMG-5700.jpg

One of the things I miss most about pre-pandemic life is getting to see my work friends in Chicago. My team is based in Toronto, Chicago and Montreal, and normally we would see each other every few weeks in person. The past few years I would go to Chicago 3-4 times a year, and I absolutely adore the city and its food scene. Some of the best meals I’ve ever had were in Chicago. The Girl & the Goat (+ every Stephanie Izard restaurant), avec, Monteverde, Publican, Topolobampo, Au Cheval, the list goes on!

On one of my last trips there in 2019 I went to avec with my work friend for dinner. It now feels like a totally different world - narrow, crowded restaurant, bench style tables that you share with other parties basically nudging each other's elbows. When we arrived my friend said we had to get the stuffed dates to start. Reading the menu I was so intrigued. I’d had bacon wrapped dates before, I’d had bacon wrapped water chestnuts too, but the idea of dates with chorizo and bacon AND spicy marinara seemed so out of the box to me. These were not things I would think to combine. When I took my first bite my mind was blown and that food memory is forever etched in my mind. The chorizo and marinara bring a spicy heat, the dates become sticky sweet, and the bacon ties it all together with saltiness and smoke. 

This recipe is my rustic interpretation of that dish. If you look at avec’s Instagram you’ll see perfectly wrapped dates, glistening in sauce. These are a bit more home-y, but the flavour is all there. These would work as an appetizer or can hold up as a main. The recipe is flexible based on how many dates you have. 

F9B3BBE6-79F1-4A9E-B302-1C1EECCDB2B6 (1).JPG

A few tips:

  • Chorizo sausage: you want to buy fresh sausages for this recipe, not dry-cured. Most grocery stores will have “Spanish-style chorizo” in the sausage section, but if you are able to go to your local butcher or sausage spot, I recommend getting them there!

  • Medjool dates: although they are more expensive than regular dates, Medjool dates are key to get the sweet caramel flavour this recipe needs. They are a bit of a splurge but totally worth it for this recipe. You can get them at the grocery store, online, or at your local bulk store.

  • Bacon: If there was ever a time to splurge on bacon, this is one of them (although I personally think you should always splurge on bacon!). If you can get your bacon from a local butcher, that’s best. You want the thicker cut, double smoked if possible. 

  • Serving tips: I love this with crusty bread to dip into the sauce. As a main, serve it with a bright, acidic salad (even just arugula with lemon juice and olive oil works!).


Chorizo Stuffed Dates with Bacon and Spicy Marinara

Serves 4-6 people as a main, 10-12 as an appetizer if you make them small!

15 min prep time, 60 mins cook time


Ingredients:

4 chorizo sausages (fresh - not cured)

12-20 Medjool dates

1 package good bacon (need 12-20 slices, or 6-10 cut in half)

Marinara sauce (notes below of how I make it from scratch if not using bottled)


Method:

  1. Preheat oven to 375

  2. Prepare a cookie sheet with parchment paper or a silicone mat.

  3. Open your dates and remove the pit, flatten them by pressing with your thumbs and middle fingers, and set them aside

  4. Remove sausage from casing and form into meatballs (same amount of meatballs as dates)

  5. Place a meatball on each flattened date, wrapping the date around the meatball (depending on the size it might just cover half).

  6. Wrap each “meatball date” in bacon, and place onto cookie sheet. If you have extra bacon leftover you can always put it onto the sheet to crisp up for a “chef snack” :)

  7. Bake until meatballs are cooked through (165F internal temperature) - 45-60 mins depending on the size of the meatball.

  8. Serve in marinara! I like to pour the pan drippings into the marinara sauce for extra flavour. Best served with crusty bread.

Spicy Marinara:

1/4 cup olive oil

1 white onion, finely diced

2 cloves of garlic, minced

1/2 tsp crushed red pepper

2 tbsp tomato paste

1 can tomatoes (794g) or bottle of crushed tomatoes (passata)

  1. Heat oil in a saucepan over medium

  2. Add onion and garlic, cook, until softened (5-7 mins)

  3. Add crushed red pepper flakes and tomato paste, cook out for 2-3 mins

  4. Add in tomatoes (if whole tomatoes, crush with your hands as you add-in)

  5. Simmer on low, covered for 30 mins - 2 hours! Stir every once in a while to ensure it’s not burning on the bottom. Season to taste with salt and pepper.


Sweet and Spicy Cauliflower Bites

Cauliflower bites on white plate glazed with a sweet and spicy sauce

I am currently home in Halifax for a few months to wait out the winter, so I’ve been enjoying cooking for my parents again. I live alone in Toronto and knew that the winter would be tough in the pandemic without … human contact. While I am home my mom and I are trying to eat more plant-based meals coming off the holidays, which involved a lot of meat and pastries, and pastry wrapped meat. These cauliflower bites are the perfect veggie appetizer, snack or main (paired with a big salad).

Cauliflower has become really trendy in the last few years but I’m kind of ok with it. I find it super filling, and these bites are no exception. It’s also a blank canvas that can take on pretty much any flavour. I also love how cauliflower can become so creamy when cooked through, and these bites pair that creamy texture with a crispy, slightly chewy exterior. 

I am borderline obsessed with these cauliflower bites. I love that they are made in one bowl, and the texture they get without oil or frying makes me very happy. I hate when you have to set up an intense dredging station to get something breaded (one bowl for egg, one bowl for flour, one bowl for crust). It’s worth the effort but sometimes you just don’t want to put in the effort, ya know?

The key to these cauliflower bites is the biscuit-like batter, that when cooked for a super long time gets crispy and holds up against the sauce. The batter completely coats the cauliflower, seeping into all the little crevices, making an almost fritter meets cauliflower bite… bite. 

There are a lot of different directions you could take these bites - Franks Red Hot Sauce paired with ranch to go traditional buffalo style; I am also going to try them out with some spices added to the batter (like chili powder and cumin) to use for cauliflower tacos. But today’s recipe is inspired by flavours of the Vietnamese sauce nuoc cham. Typically nuoc cham includes water so this is a bit more concentrated. I also added in melted butter to allow the sauce to emulsify, helping it coat the cauliflower more evenly and added a bit of richness. The sauce is tangy, sweet and spicy. Topping with fresh herbs or sliced green onion adds some freshness to finish them off.


A few tips:

  • Spread out the cauliflower on the cookie sheet to ensure it gets nice and crispy. If you overcrowd the pan, the bites will steam - you need enough space to let the air circulate

  • 45 minutes feels like a long time in the high heat but don’t take them out sooner! You want them to deeply cook. They may have some brown bits and that’s ok! That’s just extra flavour.

To serve:

  • Best served fresh out of the oven and tossed in the sauce.

  • They will keep ok in the fridge, but they may lose some of their crunch the next day but will still be very flavourful. If you can reheat in a toaster oven or the oven vs. the microwave, that will preserve some of the texture.


Sweet and Spicy Cauliflower Bites

Serves 4-6 appetizer style

15-minute prep, 45-minute cook time


Ingredients


1 head of cauliflower, leaves and stem removed, cut into bite-sized pieces

1/2 cup all-purpose flour

1/2 cup panko

1 egg

1/2 tsp kosher salt

½ cup water or milk


2 tbsp butter

1 tbsp honey

1/2 tsp fish sauce (my favourite brand is Red Boat)

1 tsp sriracha (or other hot sauce/chilli sauce like sambal oelek)

1/4 tsp kosher salt

Juice of 1 lime (roughly 2 tbsp)


Optional toppings: fresh herbs (basil, mint) or green onions


Method 

  1. Preheat the oven to 425F. Prepare a cookie sheet with a silicone mat or line with parchment paper.

  2. In a large bowl, stir together the batter ingredients until smooth - should look like a drippy/loose biscuit batter.

  3. Add in your chopped cauliflower and toss to coat. Ensure you toss well - you want every little crevice of the cauliflower to be coated.

  4. Place the coated cauliflower onto the prepared cookie sheet one at a time, in one layer, with plenty of space between each piece.

  5. Bake for 45 minutes, until they get really dark and crispy. You can flip them over partway through to ensure both sides crisp up.

  6. Meanwhile, prep the sauce. In a microwave-safe bowl add the honey and butter. Melt in the microwave. Add in the fish sauce, hot sauce and lime juice, whisking until well emulsified. Taste and adjust with salt and pepper!

  7. When the cauliflower is done take it out of the oven and put them in a large heat-safe bowl. Pour over the sauce and toss the cauliflower until they are evenly coated.

  8. Serve on a platter topped with any soft fresh herbs you have on hand (ex. Basil, mint) and sliced green onion.


Sweet and Spicy Cheeseball

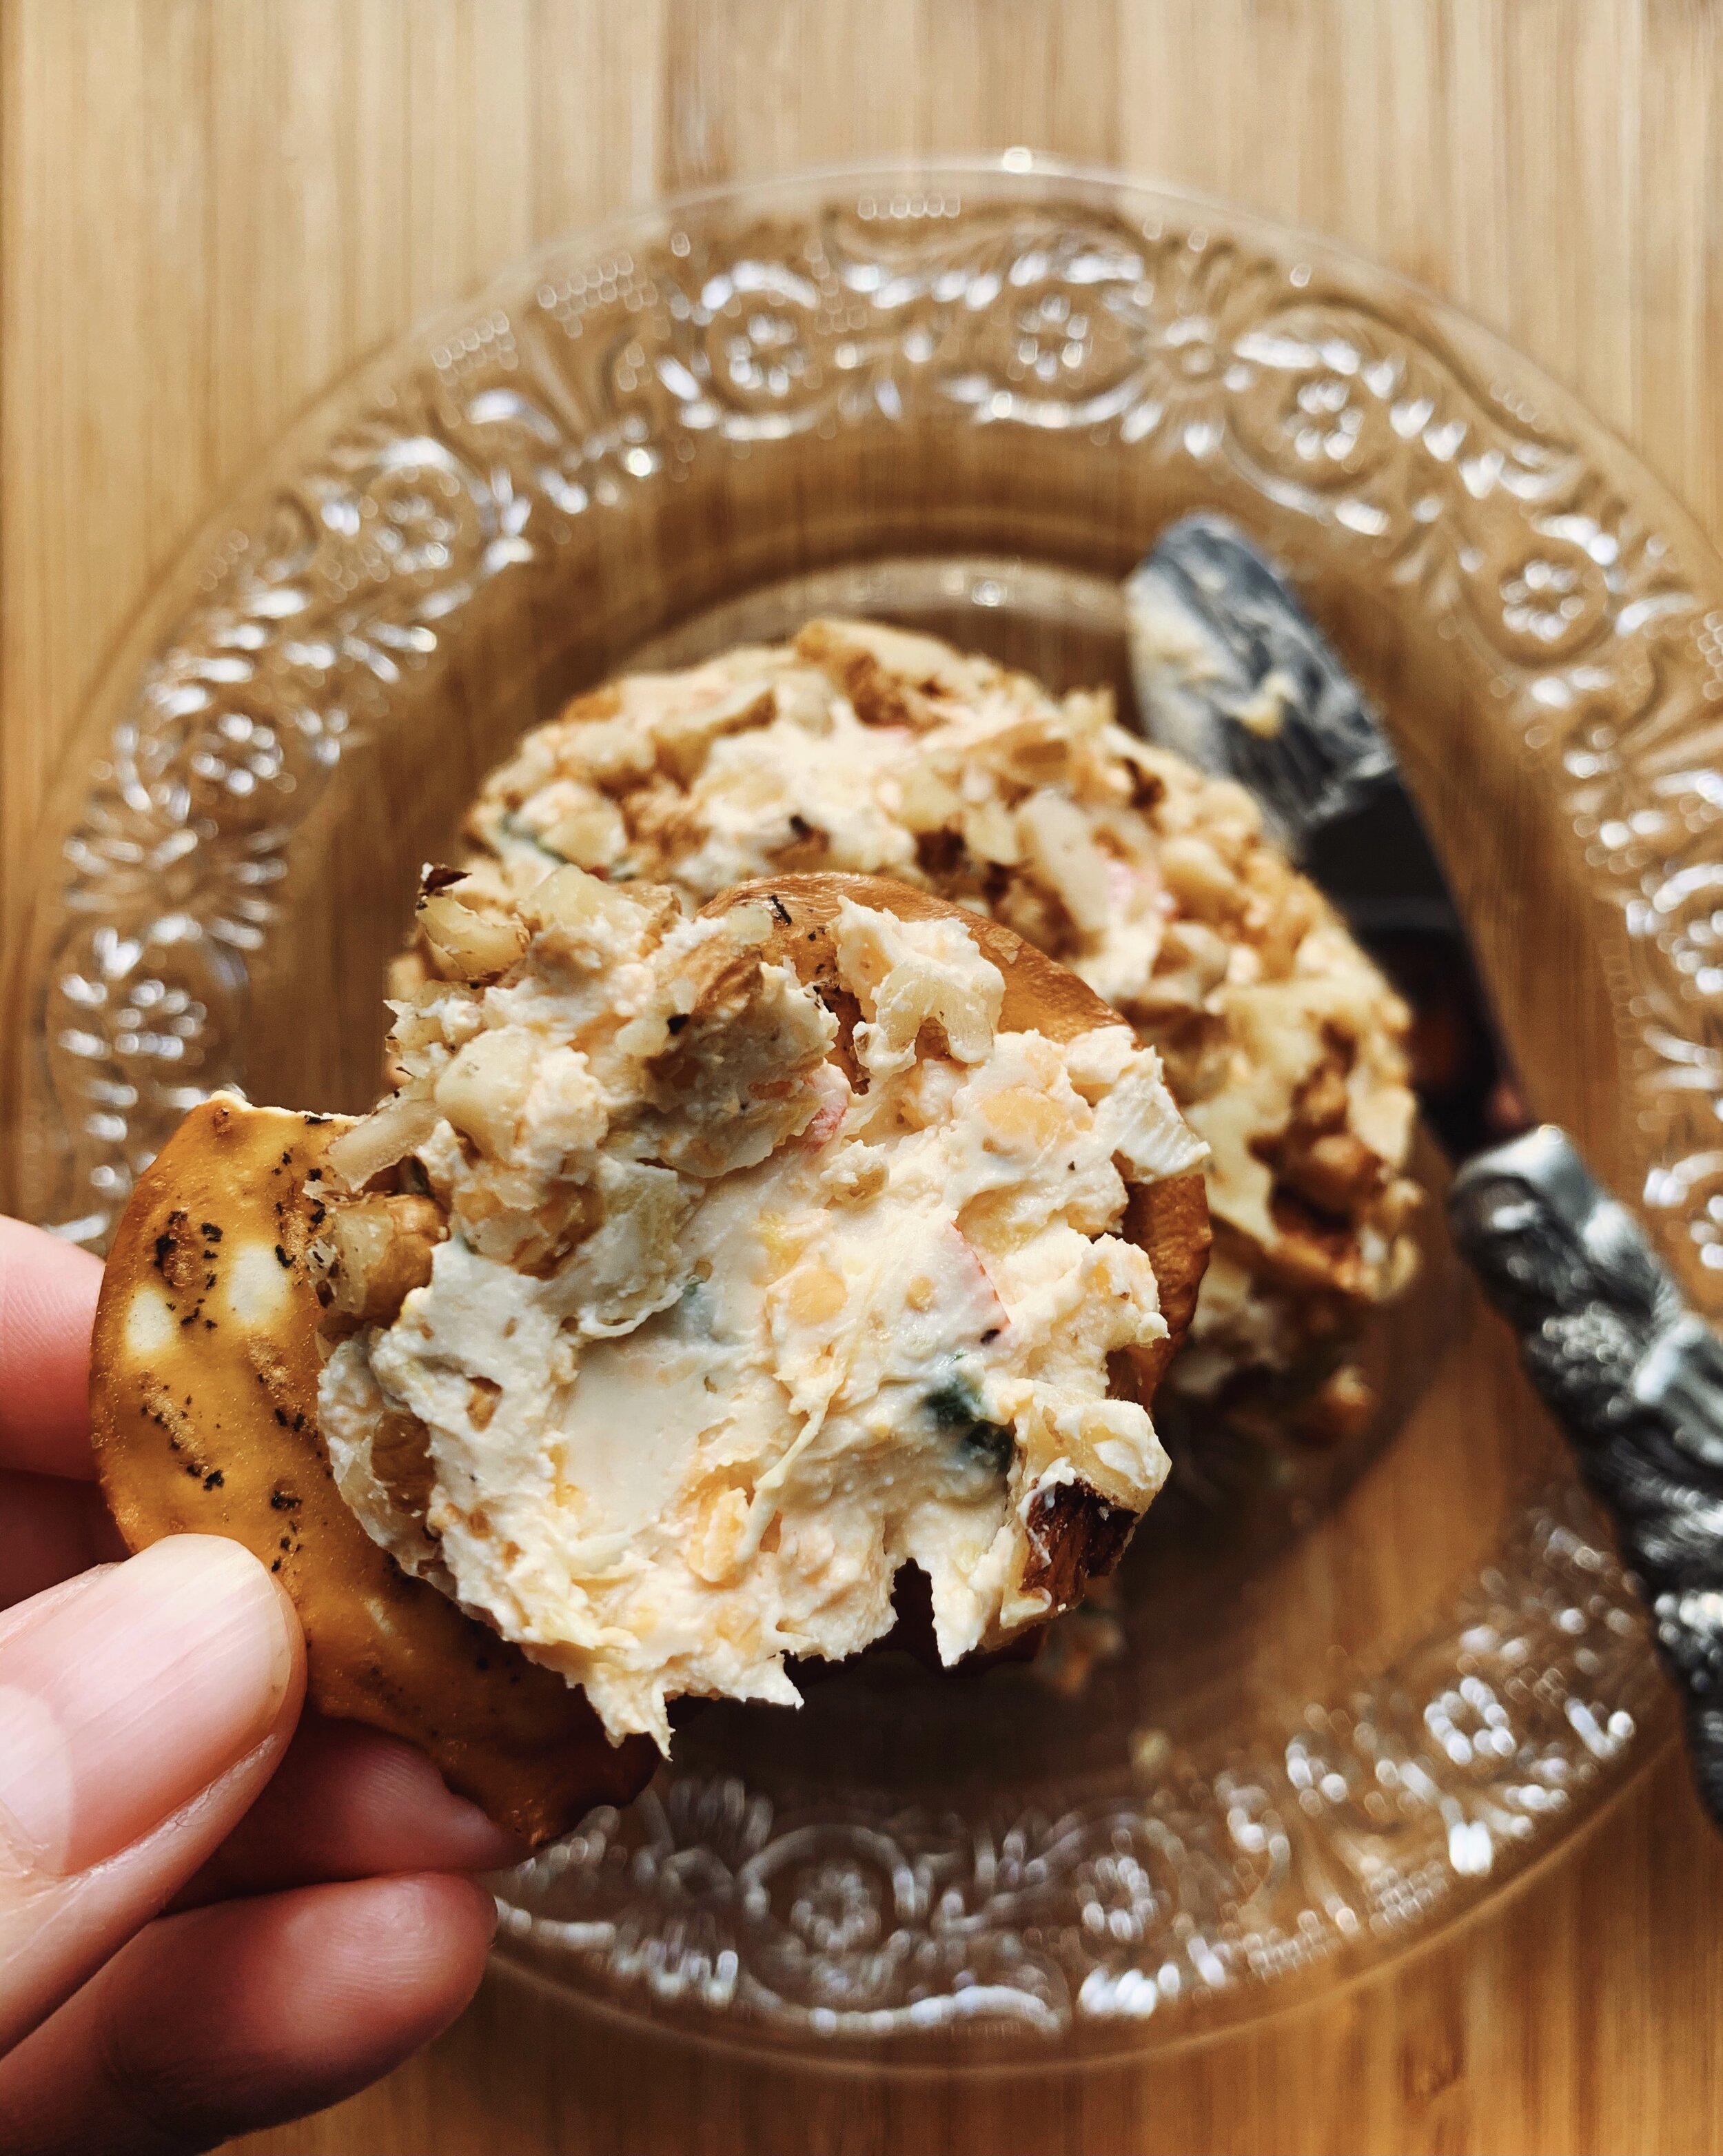
Cheeseball spread onto cracker with plate in background


I feel like the official sign of the holiday season is when cream cheese goes on sale at the grocery store. So many recipes growing up started with cream cheese - this cheeseball being my favourite. I have such a natural sweet tooth so I love how this recipe has the sweetness from the pineapple balanced with the tang and spice of the other ingredients. If you have pineapple-adverse people in your life, do not fret! It doesn't taste *like pineapple* - since you use crushed pineapple, it evenly distributes into the mixture to add subtle sweetness throughout vs straight-up pineapple flavour. The green onion adds savouriness, the red pepper adds some bite, and the Worcestershire sauce adds the tang. Tabasco is the final piece to bring this together with a lingering heat that makes you want to come back for more. 

After much testing, I’ve determined that this does in fact freeze! If it’s just you and your household this holiday season, stock your freezer with mini-cheeseballs for a special night in treat.


About the ingredients

Canned crushed pineapple

You want to make sure you are draining the pineapple super well before mixing into the cheeseball, otherwise you’ll have more of a spread instead of a firm cheese ball*. To drain, you can use a fine-mesh strainer and press on the pineapple with a spoon to push out the extra liquid, or you can put it in cheesecloth or a clean kitchen towel and squeeze out the liquid.

*Honestly, making a spread instead of forming into a cheeseball is a delicious, easier alternative. Sometimes I just put the “cheeseball” mixture in a bowl and call it a “spread”. 


Cream cheese

I buy the blocks of cream cheese to ensure the cheese ball can firm up. The spreadable cream cheese also works but you will have trouble keeping its shape. Again, the worst-case scenario is you make a “cheese ball spread” that you top with nuts, which honestly is a pretty delicious worst-case scenario.


Cheese

Make sure you choose a cheddar cheese with some oomph to it, like old cheddar. You want your cheese to add flavour and bite to balance the pineapple.


Nuts for the coating

I use whatever tree nuts (read: anything but peanuts) on hand to coat the outside. If you feel like adding an extra layer of flavour, you can toast your nuts before chopping them. I prefer to toast nuts in the oven (350F for 5-8 mins - when they smell toasty they are done!) to avoid burning. Anytime I toast nuts on the stove I inevitably forget about them and burn them.


How to store:

In the fridge: 

The cheeseball will be good in the fridge for 3-5 days. I prefer to wait to do the coating so it doesn’t get soggy, so I store it in the fridge tightly wrapped in saran wrap until just before serving. You could do the coating an hour before serving, place it on your serving plate, and loosely cover it with saran wrap to save you from having a mess when guests arrive!


To freeze:

This cheeseball freezes well which is truly a dream! You can make the cheeseballs well ahead of time and then just take them out of the freezer the morning of. Because of the pineapple, there might be a little bit of liquid in the saran wrap when it defrosts. That’s ok! Once you toss it in the nuts this extra liquid will get absorbed. Plus, if you properly drain and squeeze out the liquid from the pineapple, you shouldn’t have too many issues.

To defrost on the counter: it will take about 2 hours at room temperature to defrost. You can then store it in the fridge until ready to serve!

Cheeseball ingredients in bowl before being mixed

Sweet and Spicy Cheeseball

Yields 2-4 cheeseballs, depending on size

3 hours needed for prep to serving, only 20 mins of active work


Ingredients:

2 packs cream cheese, room temperature

1.5 cups old cheddar cheese, shredded and lightly packed

1 tbsp worcestershire sauce

2 green onions, small dice, to yield ¼ cup 

½ red pepper, small dice, to yield ½ cup 

½ cup canned crushed pineapple, well drained

½ tsp onion powder 

½ tsp garlic powder  

1-2 tsp tabasco, or other vinegar based hot sauce (1 tsp is lightly spiced, 2 tsp has some kick - anywhere in between is medium spice!)

½ cup chopped nuts of your choice (pecans, almonds, walnuts) per cheeseball - up to 1 ½ cups needed

Salt and pepper


Method:

  1. At least an hour before you start making your cheeseball, take your cream cheese out of the fridge! You want it to be truly room temperature, otherwise it will be difficult to properly mix it together.

  2. In a large bowl, combine your ingredients. Mix until well combined. I use a sturdy spatula to stir and mix together, but some people like to use an electric hand mixer. I find this breaks up the cheese a lot so I prefer to do it by hand.

  3. Once combined, divide into portions to make your cheeseballs. This year, I am making smaller versions since we are gathering in small groups but here are basic measurements:

    ¾ cup for small cheese ball - good for a gathering of 4 people, yields 3-4 cheeseballs

    1 cup for medium cheese ball - good for a gathering of 6-8 people, yields 2-3 cheese balls

    1.5 cups for large cheese ball - good for a gathering of 8+ people, yields 2ish cheeseballs

  4. I wrap the cheese ball tightly in saran wrap and let them set in the fridge for a minimum 1 hour before serving. If I’m saving for a future event, I freeze and then let it thaw on the counter the day of (more on this in the above article).

  5. Before serving, combine finely chopped nuts with a pinch of salt and good crack of pepper in a bowl. Toss the cheese ball in the coating and serve!